Friday, July 27, 2012

JAX-RS Tip of the Day: Basic Client Authentication

This is the second part of the JAX-RS Tip of the Day: Basic Authentication with JDBC. If you have not already done the pre-requisites, please examine the other article first.

Abstract

Unless you are developing a public service where authentication is not required like weather, or time services. This means that you will require authentication, and authorization. This application demonstrates how to perform basic authentication. This may be all that is required for your application, as long as, it is operating in a secure environment, or using secure transport (HTTPS).

Technical Details

If you have already completed creating a secure service, then you will really like how easy it is to create a basic authentication client for that service.

Requirements

As you can see from the code below. The most important item is to add a HTTPBasicAuthFilter to allow you to authenticate. Its that simple... really.

ExampleResourceClient.java


1
2
3
4
5
6
7
8
9
10
11
12
13
14
15
16
17
18
19
20
21
22
23
24
25
26
27
28
29
30
31
32
33
34
35
36
37
38
39
40
41
42
43
44
45
46
47
48
49
50
51
package com.bluelotussoftware.jersey;
 
import com.sun.jersey.api.client.WebResource;
import com.sun.jersey.api.client.filter.LoggingFilter;
 
/**
 * REST Basic Authentication Client Application
 *
 * @author John Yeary
 * @version 1.0
 */
public class BasicAuthenticationClient {
 
    public static void main(String[] args) {
        ExampleResourceClient erc = new ExampleResourceClient();
        erc.setUsernamePassword("jyeary", "test");
        System.out.println(erc.getMessage());
        erc.close();
    }
 
    static class ExampleResourceClient {
 
        private com.sun.jersey.api.client.WebResource webResource;
        private com.sun.jersey.api.client.Client client;
        private static final String BASE_URI = "http://localhost:8080/secure-jdbc-rest-service/resources";
 
        public ExampleResourceClient() {
            com.sun.jersey.api.client.config.ClientConfig config = new com.sun.jersey.api.client.config.DefaultClientConfig();
            client = com.sun.jersey.api.client.Client.create(config);
            client.addFilter(new LoggingFilter());
            webResource = client.resource(BASE_URI).path("example");
        }
 
        public String getMessage() throws com.sun.jersey.api.client.UniformInterfaceException {
            WebResource resource = webResource;
            return resource.accept(javax.ws.rs.core.MediaType.TEXT_PLAIN).get(String.class);
        }
 
        public void putMessage(Object requestEntity) throws com.sun.jersey.api.client.UniformInterfaceException {
            webResource.type(javax.ws.rs.core.MediaType.TEXT_PLAIN).put(requestEntity);
        }
 
        public void close() {
            client.destroy();
        }
 
        public void setUsernamePassword(String username, String password) {
            client.addFilter(new com.sun.jersey.api.client.filter.HTTPBasicAuthFilter(username, password));
        }
    }
}

Thursday, July 26, 2012

JSF Tip of the Day: <facelet-taglib /> Schema Declaration Issue

This is not so much as a tip as a warning. If you are trying to use the published schema at Java EE : XML Schemas for Java EE Deployment Descriptors and specifically the facelet-taglib schema from the definition, it has a typo in the declaration.

INCORRECT


CORRECT

Do you see the error?

It is in the schemaLocation. They misspelled library as libary in web-facelettaglibrary_2_0.xsd.


I try to confirm the schema from the source rather than copying it from some other non-authoritative source. This time I found a problem with the cannon source.

JAX-RS JUG Demo CDI and @Singleton Usage

This is the last demonstration I gave at the Greenville Java Users Group (GreenJUG) on CDI and JAX-RS. I cleaned up the code, but not as much as you would think. I managed to code this in about 15 minutes during the meeting live while everyone watched. It was a fun experience, but the best part is that it worked during a live un-rehearsed demo.

It goes to show you that CDI and JAX-RS are simple enough in combination to use in a live high stress demo environment. Imagine what it could do for you in your code. This code was written using NetBeans 7 IDE which may be responsible for the simplicity as much as the other technologies.

Here is the source code: cdi-example.zip

The code below demonstrates some interesting bits. The source code above contains the less interesting POJOs.

PersonResource.java


1
2
3
4
5
6
7
8
9
10
11
12
13
14
15
16
17
18
19
20
21
22
23
24
25
26
27
28
29
30
31
32
33
34
35
36
37
38
39
40
41
42
43
44
45
46
47
48
49
50
51
52
53
54
55
56
57
58
59
60
61
62
63
package com.bluelotussoftware.example;
 
import java.util.List;
import javax.annotation.ManagedBean;
import javax.inject.Inject;
import javax.ws.rs.*;
import javax.ws.rs.core.MediaType;
import javax.ws.rs.core.Response;
 
/**
 * REST resource for {@link com.bluelotussoftware.example.Person} objects.
 *
 * @author John Yeary
 * @version 1.0
 */
@Path("person")
@ManagedBean
public class PersonResource {
 
    @Inject
    private PersonDB pdb;
 
    @GET
    @Produces({MediaType.APPLICATION_JSON})
    public List<person> getPersons() {
        return pdb.getPersons();
    }
 
    @GET
    @Path("{index}")
    @Produces({MediaType.APPLICATION_JSON})
    public Person getPerson(@PathParam("index") int index) {
        try {
            return pdb.getPersons().get(index);
        } catch (IndexOutOfBoundsException e) {
            throw new WebApplicationException(e, Response.Status.NOT_FOUND);
        }
    }
 
    @GET
    @Path("{index}/phones")
    @Produces({MediaType.APPLICATION_JSON})
    public List<phone> getPhones(@PathParam("index") int index) {
        return pdb.getPersons().get(index).getPhoneNumbers();
    }
 
    @GET
    @Path("{index}/phones/{location}")
    @Produces({MediaType.APPLICATION_JSON})
    public Phone getPhone(@PathParam("index") int index, @PathParam("location") String location) {
        try {
            List<phone> phones = pdb.getPersons().get(index).getPhoneNumbers();
            for (Phone p : phones) {
                if (location != null && location.equals(p.getLocation())) {
                    return p;
                }
            }
            return new Phone();
        } catch (IndexOutOfBoundsException e) {
            throw new WebApplicationException(e, Response.Status.NOT_FOUND);
        }
    }
}

PersonDB.java


1
2
3
4
5
6
7
8
9
10
11
12
13
14
15
16
17
18
19
20
21
22
23
24
25
26
27
28
29
30
31
32
33
34
35
36
37
38
39
40
41
42
43
44
45
46
47
48
49
50
package com.bluelotussoftware.example;
 
import java.io.Serializable;
import java.util.ArrayList;
import java.util.Collections;
import java.util.Date;
import java.util.List;
import javax.annotation.PostConstruct;
import javax.inject.Singleton;
 
/**
 * A {@code @Singleton} database of {@link com.bluelotussoftware.example.Person}
 * objects.
 *
 * @author John Yeary
 * @version 1.0
 */
@Singleton
public class PersonDB implements Serializable {
 
    private static final long serialVersionUID = 2500854255025449263L;
    private List<person> persons;
 
    public PersonDB() {
        persons = new ArrayList<person>();
    }
 
    @PostConstruct
    private void init() {
        List<phone> phones = new ArrayList<phone>();
        phones.add(new Phone("Home", "111-222-3333"));
        phones.add(new Phone("Mobile", "999-111-2222"));
        phones.add(new Phone("Work", "888-777-6666"));
        persons.add(new Person("John", new Date(), phones));
        persons.add(new Person("Sean", new Date(), phones));
        persons.add(new Person("Ethan", new Date(), phones));
    }
 
    public List<person> getPersons() {
        return Collections.unmodifiableList(persons);
    }
 
    public boolean addPerson(Person p) {
        return persons.add(p);
    }
 
    public boolean removePerson(Person p) {
        return persons.remove(p);
    }
}

JAX-RS JUG Demo Examples (@QueryParam and @PathParam)

I gave a demo of JAX-RS using @QueryParam and @PathParam annotations, and created a client to connect with the resources and display the results. I promised to post the code. So here it is along with some cleanup.

Here are the Apache Maven projects and code:
simple-queryparam-example.zip
simple-queryparam-client-example.zip

Example.java


1
2
3
4
5
6
7
8
9
10
11
12
13
14
15
16
17
18
19
20
21
22
23
24
25
26
27
28
29
30
31
32
33
34
package com.bluelotussoftware.example;
 
import javax.ws.rs.GET;
import javax.ws.rs.Path;
import javax.ws.rs.PathParam;
import javax.ws.rs.QueryParam;
 
/**
 *
 * @author John Yeary
 * @version 1.0
 */
@Path("example")
public class Example {
 
    @GET
    public String helloQueryParam(@QueryParam("name") String name) {
        if (name != null) {
            return "Hello, " + name;
        } else {
            return "Hello Anonymous";
        }
    }
 
    @GET
    @Path("{name}")
    public String helloPathParam(@PathParam("name") String name) {
        if (name != null) {
            return "Hello, " + name;
        } else {
            return "Hello Anonymous";
        }
    }
}

SimpleExampleClientApplication.java


1
2
3
4
5
6
7
8
9
10
11
12
13
14
15
16
17
18
19
20
21
22
23
24
25
26
27
28
29
30
31
32
33
34
35
36
37
38
39
40
41
42
43
44
45
46
47
48
49
50
51
52
package com.bluelotussoftware.example;
 
import com.sun.jersey.api.client.Client;
import com.sun.jersey.api.client.UniformInterfaceException;
import com.sun.jersey.api.client.WebResource;
 
/**
 * Simple Example Client Application
 *
 * @author John Yeary
 * @version 1.0
 */
public class SimpleExampleClientApplication {
     
    public static void main(String[] args) {
        ExampleClient ec = new ExampleClient();
        System.out.println(ec.helloQueryParam("Swathi"));
        System.out.println(ec.helloPathParam("John"));
        ec.close();
    }
     
    static class ExampleClient {
         
        private WebResource webResource;
        private Client client;
        private static final String BASE_URI = "http://localhost:8080/simple-queryparam-example/resources";
         
        public ExampleClient() {
            com.sun.jersey.api.client.config.ClientConfig config = new com.sun.jersey.api.client.config.DefaultClientConfig();
            client = Client.create(config);
            webResource = client.resource(BASE_URI).path("example");
        }
         
        public String helloQueryParam(String name) throws UniformInterfaceException {
            WebResource resource = webResource;
            if (name != null) {
                resource = resource.queryParam("name", name);
            }
            return resource.get(String.class);
        }
         
        public String helloPathParam(String name) throws UniformInterfaceException {
            WebResource resource = webResource;
            resource = resource.path(java.text.MessageFormat.format("{0}", new Object[]{name}));
            return resource.get(String.class);
        }
         
        public void close() {
            client.destroy();
        }
    }
}

Wednesday, July 25, 2012

JAX-RS Tip of the Day: Basic Authentication with JDBC

Abstract

Unless you have a public API like a weather service, or perhaps barometric pressure measurements. You will likely need some form of authentication, and authorization for your service. A tried and tested mechanism is to use JDBC Realm based authentication. In this example I will create  a set of database tables on Apache Derby, set up the security realm on GlassFish 3.1.2.2, and configure basic authentication on a RESTful web service. The majority of the work will be done using the NetBeans IDE 7.2.

Requirements

Database

The first thing we need to do is to set up our database tables which we will use for authentication. These tables can contain more information, but in my example I will keep them simple.

Creating Tables

First we will need to create a Users table which will contain our username and password. Using the sample database in NetBeans do the following:
  1. Select the Services Window, and open the Databases selection
  2. Right click on the Java DB icon, and start the server if it is not already started
  3. Right click on the sample database connection: jdbc:derby://localhost:1527/sample [app on APP] and connect.
  4. Right click on the sample connection and select Execute Command.
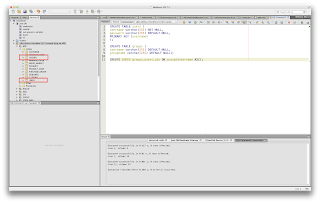
  5. Execute the create table commands and create index commands below.
CREATE TABLE users ( username varchar(255) NOT NULL, password varchar(255) DEFAULT NULL, PRIMARY KEY (username) );
CREATE TABLE groups ( username varchar(255) DEFAULT NULL, groupname varchar(255) DEFAULT NULL);
CREATE INDEX groups_users_idx ON groups(username ASC);
Create Tables

Add Users and Groups

We need to add at least one user and group to our table. Since I am using GlassFish as the container, I will use SHA-256 to hash my password. That way it is not visible in plain text.
  1. Right click on our new USERS table, and select View Data
  2. Click on the Insert Records Icon
  3. Add a user, and add a SHA-256 hash of the password.
    Note:An online generator can be found at SHA-256 hash calculator
  4. Repeat the same process as above to open the GROUPS table
  5. Add the username and a group called users
That completes all we need for our JDBC authentication.

GlassFish JDBC Realm

Using the NetBeans IDE perform the following:
  1. Go to the Services window and expand the Servers selection.
  2. Right click on GlassFish 3.1.2 server and select Start.
  3. Right click and select View Domain Admin Console.
  4. On the Admin console web page on the tree on the left select Configurations » server-config » Security » Realms.
  5. Add a new realm called jdbc with the following properties:
    • Name: jdbc
    • Class Name: com.sun.enterprise.security.auth.realm.jdbc.JDBCRealm
    • JAASContext: jdbcRealm
    • JNDI: jdbc/sample
    • User Table: users
    • User Name Column: username
    • Password Column: password
    • Group Table: groups
    • Group Table User Name Column: username
    • Group Name Column: groupname
    • Database User: app
    • Database Password: app
    • Digest Algorithm: SHA-256
    • Encoding: Hex
    • Charset: UTF-8

    Note: the parameters are case sensitive.
  6. Navigate to Configurations » server-config » Security
  7. Change the Default Realm to jdbc
  8. Check the Default Principal To Role Mapping checkbox to enabled
  9. Click Save and Restart server.
The security mapping configuration for automatic mapping makes it so that our application will not require a glassfish-web.xml file as part of our deployment.

JAX-RS Application

Finally we have completed all of the requirements on the server side for securing our applications. This security mechanism can be used by more than the application we will are preparing to deploy. We need to set up the security constraints in our web.xml file as shown below. If you have downloaded the code you can simply open it in NetBeans and examine it.

web.xml


1
2
3
4
5
6
7
8
9
10
11
12
13
14
15
16
17
18
19
20
21
22
23
24
25
26
27
28
29
30
31
32
33
34
35
36
37
38
39
40
41
<?xml version="1.0" encoding="UTF-8"?>
    <servlet>
        <servlet-name>BasicServletAdaptor</servlet-name>
        <servlet-class>com.sun.jersey.spi.container.servlet.ServletContainer</servlet-class>
        <load-on-startup>1</load-on-startup>
    </servlet>
     
    <servlet-mapping>
        <servlet-name>BasicServletAdaptor</servlet-name>
        <url-pattern>/resources/*</url-pattern>
    </servlet-mapping>
     
    <session-config>
        <session-timeout>
            30
        </session-timeout>
    </session-config>
     
    <security-constraint>
        <display-name>Basic Protection</display-name>
        <web-resource-collection>
            <web-resource-name>REST</web-resource-name>
            <description/>
            <url-pattern>/resources/*</url-pattern>
        </web-resource-collection>
        <auth-constraint>
            <description/>
            <role-name>users</role-name>
        </auth-constraint>
    </security-constraint>
     
    <login-config>
        <auth-method>BASIC</auth-method>
        <realm-name>jdbc</realm-name>
    </login-config>
    <security-role>
        <description>Users</description>
        <role-name>users</role-name>
    </security-role>
</web-app>
Using NetBeans, you can simply run the application and it will prompt you for an application server. Select the current GlassFish server we have set-up, and it will deploy in a few seconds. You will come to a index.jsp page.
Click on the link for the application.wadl, or navigate to http://localhost:8080/secure-jdbc-rest-service/resources/example and you will be prompted to login. Once you login, you should get this message from the REST service.
This is an example message

Thursday, July 12, 2012

JSF Tip of the Day: Creating Composite Components

The NetBeans IDE is a great tool for doing Java EE development. One feature that I think is overlooked is the ability to refactor your XHTML pages into composite components. The video below demonstrates how to do it. The code was developed using NetBeans IDE and GlassFish.

The cleaned up and more polished code is provided for your enjoyment: sample-composite-component-demo.zip

Monday, July 09, 2012

JSF Tip of the Day: <ui:repeat /> Usage Example

Abstract

A common use case is to iterate over a collection of elements, and display them on a page. In the world of JSP, we would use a Java Standard Tag Library (JSTL) <c:forEach/>. This will work in JSF, but does have the same lifecycle as JSF which can cause issues if the data is dependent on the JSF lifecycle.
The solution is to use <ui:repeat/> to iterate over the collection. The <ui:repeat/> Facelets component is designed to work with JSF. It has the same lifecycle as the other JSF components on the page, and is a lot more flexible than the <c:forEach/> tag.

Description

The examples in this project demonstrate a number of methods to utilize the <ui:repeat/> in your own project.

Bug

There is a bug in versions of Mojarra less than 2.1.9 that the size includes the end element as per JAVASERVERFACES-2210.It was fixed as of version 2.1.9. Note: You will need to upgrade JSF libraries in GlassFish to see the corrections. Please see the release notes for Java Server Faces for upgrade procedures. The project was developed using NetBeans 7 IDE and Apache Maven. The project was tested on GlassFish 3.1.2.

The code for the project can be downloaded here: ui-repeat.zip

Code

index.xhtml


1
2
3
4
5
6
7
8
9
10
11
12
13
14
15
16
17
18
19
20
21
22
23
24
25
26
27
28
29
30
31
32
33
34
35
36
37
38
39
40
41
42
43
44
45
46
47
48
49
50
51
52
53
54
55
56
57
58
59
60
61
62
63
64
65
66
67
68
69
<?xml version='1.0' encoding='UTF-8' ?>
<!DOCTYPE html PUBLIC "-//W3C//DTD XHTML 1.0 Transitional//EN" "http://www.w3.org/TR/xhtml1/DTD/xhtml1-transitional.dtd">
      xmlns:h="http://java.sun.com/jsf/html"
      xmlns:ui="http://java.sun.com/jsf/facelets">
    <h:head>
        <title><ui:repeat/> Examples</title>
    </h:head>
    <h:body>
        <h1>
<ui:repeat/> Examples</h1>
<h2>
Example 1</h2>
<p>
This example uses a <ui:repeat size="max" value="5"/> to set the number of times the rows repeat.
 
            Please note that the size includes the end element as per <a href="http://java.net/jira/browse/JAVASERVERFACES-2210">JAVASERVERFACES-2210</a>.
 
            It was fixed as of version 2.1.9 and now correctly displays 5 elements instead of 6.
        </p>
<p>
<strong>Note:</strong> You will need to upgrade JSF libraries in GlassFish to see the corrections.
 
            Please see the release notes for Java Server Faces for upgrade procedures.
        </p>
<ui:param name="max" value="5"/>
        <table>
            <ui:repeat var="i" size="#{max}" value="#{indexBean.values}">
<tr>
                    <td>
                        #{i}
                    </td>
                </tr>
</ui:repeat>
        </table>
<hr/>
        <h2>
Example 2</h2>
<p>
This example uses <ui:repeat /> that has the value
 
            bound using EL 2.2 in a <code>@ManagedBean</code> with <code>indexBean.rowNumbers(max)</code>.
        </p>
<table>
            <ui:repeat var="i" value="#{indexBean.rowNumbers(max)}">
<tr>
                    <td>
                        #{i}
                    </td>
                </tr>
</ui:repeat>
        </table>
<hr/>
        <h2>
Example 3</h2>
<p>
This example uses a size=10 which should correctly print out all 10 elements.
        </p>
<table>
            <ui:repeat var="i" size="10" value="#{indexBean.values}">
<tr>
                    <td>
                        #{i}
                    </td>
                </tr>
</ui:repeat>
        </table>
</h:body>
</html>

IndexBean.java


1
2
3
4
5
6
7
8
9
10
11
12
13
14
15
16
17
18
19
20
21
22
23
24
25
26
27
28
29
30
31
32
33
34
35
36
37
38
39
40
41
42
43
package com.bluelotussoftware.example.jsf;
 
import java.util.ArrayList;
import java.util.List;
import javax.faces.bean.ManagedBean;
 
/**
 * Page backing bean used to provide sample values for the <ui:repeat/>
 * components on the index.xhtml page.
 *
 * @author John Yeary
 * @version 1.0
 */
@ManagedBean
public class IndexBean {
 
    /**
     * Generates a list of 10 values from 0-9.
     *
     * @return a list of values from 0-9.
     */
    public List<integer> getValues() {
        List<integer> values = new ArrayList<integer>();
        for (int i = 0; i < 10; i++) {
            values.add(i);
        }
        return values;
    }
 
    /**
     * Return a list of row numbers from 0 to the maximum value provided.
     *
     * @param max the maximum size of the list of returned values.
     * @return a list of values starting from 0 to {@code max}.
     */
    public List<Integer> rowNumbers(final int max) {
        List<integer> values = new ArrayList<integer>();
        for (int i = 0; i < max; i++) {
            values.add(i);
        }
        return values;
    }
}

Sunday, July 08, 2012

JAX-RS Simple XML Service and Client Example

I thought that I would publish the information and code from a recent JUG meeting where I coded some simple JAX-RS examples on the fly to show how easy it can be to create RESTful web services.

This particular code for the service and client are nothing fancy, but I told the JUG members that I would publish it when I got a chance.

Code

The Apache Maven based projects were developed using the NetBeans 7 IDE and GlassFish 3.1.2. You will need to run the simple-xml-example project first before you can run the client application.

The code for the projects can be downloaded here: simple-xml-example.zip and simple-xml-example-client.zip

ExampleResource.java


1
2
3
4
5
6
7
8
9
10
11
12
13
14
15
16
17
18
19
20
21
22
23
24
25
26
27
28
29
30
31
32
33
34
35
36
package com.bluelotussoftware.example;
 
import javax.ws.rs.*;
import javax.ws.rs.core.MediaType;
 
/**
 * Example REST Web Service
 *
 * @author John Yeary
 * @version 1.0
 */
@Path("example")
public class ExampleResource {
 
    /**
     * Creates a new instance of ExampleResource
     */
    public ExampleResource() {
    }
 
    @GET
    @Produces(MediaType.APPLICATION_XML)
    public String getXml() {
        StringBuilder sb = new StringBuilder();
        sb.append("<?xml version='1.0'?><message>").append("This is the message").append("</message>");
        return sb.toString();
    }
 
    @PUT
    @Consumes({MediaType.APPLICATION_XML})
    @Produces({MediaType.APPLICATION_XML})
    public String putXml(String content) {
        System.out.println(content);
        return content;
    }
}

SimpleXMLExampleClient.java


1
2
3
4
5
6
7
8
9
10
11
12
13
14
15
16
17
18
19
20
21
22
23
24
25
26
27
28
29
30
31
32
33
34
35
36
37
38
39
40
41
42
43
44
45
46
47
48
package com.bluelotussoftware.example;
 
import com.sun.jersey.api.client.Client;
import com.sun.jersey.api.client.UniformInterfaceException;
import com.sun.jersey.api.client.WebResource;
 
/**
 * Simple XML REST client.
 *
 * @author John Yeary
 * @version 1.0
 */
public class SimpleXMLExampleClient {
 
    public static void main(String[] args) {
        ExampleResourceClient erc = new ExampleResourceClient();
        System.out.println(erc.getXml());
        String s = "<?xml version='1.0'?><message>My Personal message</message>";
        System.out.println(erc.putXml(s));
        erc.close();
    }
 
    static class ExampleResourceClient {
 
        private WebResource webResource;
        private Client client;
        private static final String BASE_URI = "http://localhost:8080/simple-xml-example/resources";
 
        public ExampleResourceClient() {
            com.sun.jersey.api.client.config.ClientConfig config = new com.sun.jersey.api.client.config.DefaultClientConfig();
            client = Client.create(config);
            webResource = client.resource(BASE_URI).path("example");
        }
 
        public String getXml() throws UniformInterfaceException {
            WebResource resource = webResource;
            return resource.accept(javax.ws.rs.core.MediaType.APPLICATION_XML).get(String.class);
        }
 
        public String putXml(Object requestEntity) throws UniformInterfaceException {
            return webResource.type(javax.ws.rs.core.MediaType.APPLICATION_XML).put(String.class, requestEntity);
        }
 
        public void close() {
            client.destroy();
        }
    }
}

JSF Tip of the Day: @ViewScoped and @ConversationScoped Usage

Abstract

A question that often comes up is when and where to use a particular scope in JSF. This has become even muddier with the addition of CDI support in JSF. In the upcoming release of Java EE 7, there will be even more scopes to consider. This example code demonstrates using @ViewScoped and @ConversationScoped.

Explanation

@ViewScoped

If you want to have the information on the page to update, and you are not navigating away from the page; a clear choice is the use of @ViewScoped. This is particularly true when the page is heavily dependent on AJAX. This allows partial-page submission for validation for example without losing the data contained on the page.

@ConversationScoped

@ConversationScoped scoped bean is for a long running process where there is a definite beginning and end. A perfect example is a wizard, or checking out of an online store.

The conversation begins when you click "Pay" and ends when you are given your receipt, or order information. Another example would be a complex series of wizards where there are multiple pages to complete the process. The point to keep in mind is that you have a clear bounds to start and end with.

Description

In this example code, I have a list of family members which are in different scopes depending on which example you pick. In the @ViewScoped bean you can delete people from the list and it maintains the list of changes unless you navigate away from the page. Then the list is reset back to the original values. In the @ConversationScoped bean, once you navigate to the page, a conversation begins. This will allow you to modify the list of names, and navigate to different pages and back without losing your data. Once you click on the End button, the conversation ends.

Code

The project was developed using NetBeans 7 IDE and Apache Maven. The project was tested on GlassFish 3.1.2.

The code for the project can be downloaded here: scope-examples.zip

viewscope.xhtml


1
2
3
4
5
6
7
8
9
10
11
12
13
14
15
16
17
18
19
20
21
22
23
24
25
26
27
28
29
30
31
32
33
34
35
36
37
38
39
40
41
42
43
44
45
46
47
48
49
50
<?xml version='1.0' encoding='UTF-8' ?>
<!DOCTYPE html PUBLIC "-//W3C//DTD XHTML 1.0 Transitional//EN" "http://www.w3.org/TR/xhtml1/DTD/xhtml1-transitional.dtd">
      xmlns:f="http://java.sun.com/jsf/core"
      xmlns:h="http://java.sun.com/jsf/html"
      >
    <h:head>
        <title>Family Names - @ViewScoped</title>
    </h:head>
    <h:body>
        <h1>
Family Names - @ViewScoped</h1>
<p>
You can delete elements from the table below. The page will reload on submit, or you can use
 
            the command button to force a reload of the page. The elements which you delete will remain
 
            deleted.
        </p>
<p>
If you choose to navigate back to the index page, or conversation scope and return, the list of
 
            family members will contain the original complete list.
        </p>
<h:form>
            <h:dataTable id="namesTable" value="#{viewScopeBean.names}" var="name">
                <f:facet name="header">
                    <h:outputText value="Family Members"/>
                </f:facet>
                <h:column>
                    <f:facet name="header">
                        <h:outputText value="Name"/>
                    </f:facet>
                    <h:outputText value="#{name}" />
                </h:column>
                <h:column>
                    <h:commandButton value="Delete" action="#{viewScopeBean.delete(name)}"/>
                </h:column>
                <f:facet name="footer">
                    <h:outputText value="Count: #{viewScopeBean.names.size()}"/>
                </f:facet>
            </h:dataTable>
            <h:panelGroup>
                <h:commandButton value="Reload"/>
                <h:commandButton value="Index" action="index"/>
                <h:commandButton action="conversation.xhtml" value="Conversation Scope"/>
            </h:panelGroup>
        </h:form>
    </h:body>
</html>

conversation.xhtml


1
2
3
4
5
6
7
8
9
10
11
12
13
14
15
16
17
18
19
20
21
22
23
24
25
26
27
28
29
30
31
32
33
34
35
36
37
38
39
40
41
42
43
44
45
46
47
48
49
50
51
52
53
<?xml version='1.0' encoding='UTF-8' ?>
<!DOCTYPE html PUBLIC "-//W3C//DTD XHTML 1.0 Transitional//EN" "http://www.w3.org/TR/xhtml1/DTD/xhtml1-transitional.dtd">
      xmlns:f="http://java.sun.com/jsf/core"
      xmlns:h="http://java.sun.com/jsf/html"
      >
    <h:head>
        <title>Family Members - @ConversationScoped</title>
    </h:head>
    <h:body>
        <h1>
Family Members - @ConversationScoped</h1>
<p>
You can delete elements from the table below. The page will reload on submit, or you can use
 
            the command button to force a reload of the page. The elements which you delete will remain
 
            deleted.
        </p>
<p>
If you choose to navigate back to the index page, or view scope and return, the list of
 
            family members will remain in the previous state. If you press the command button to end
 
            the conversation, the list will return to the original state.
        </p>
<h:form>
            <h:dataTable id="namesTable" value="#{conversationBean.names}" var="name">
                <f:facet name="header">
                    <h:outputText value="Family Members"/>
                </f:facet>
                <h:column>
                    <f:facet name="header">
                        <h:outputText value="Name"/>
                    </f:facet>
                    <h:outputText value="#{name}" />
                </h:column>
                <h:column>
                    <h:commandButton value="Delete" action="#{conversationBean.delete(name)}"/>
                </h:column>
                <f:facet name="footer">
                    <h:outputText value="Count: #{conversationBean.names.size()}"/>
                </f:facet>
            </h:dataTable>
            <h:panelGroup>
                <h:commandButton value="Reload"/>
                <h:commandButton action="#{conversationBean.destroy()}" value="End"/>
                <h:commandButton value="Index" action="index.xhtml"/>
                <h:commandButton value="View Scoped" action="viewscope.xhtml"/>
            </h:panelGroup>
        </h:form>
    </h:body>
</html>

ViewScopeBean.java


1
2
3
4
5
6
7
8
9
10
11
12
13
14
15
16
17
18
19
20
21
22
23
24
25
26
27
28
29
30
31
32
33
34
35
36
37
38
39
40
41
42
43
44
45
46
47
package com.bluelotussoftware.example.jsf;
 
import java.io.Serializable;
import java.util.ArrayList;
import java.util.List;
import javax.annotation.PostConstruct;
import javax.faces.bean.ManagedBean;
import javax.faces.bean.ViewScoped;
 
/**
 *
 * @author John Yeary
 * @version 1.0
 */
@ManagedBean
@ViewScoped
public class ViewScopeBean implements Serializable {
 
    private static final long serialVersionUID = 3152248670694285690L;
    private List<string> names;
 
    public ViewScopeBean() {
        names = new ArrayList<string>();
    }
 
    @PostConstruct
    private void initialize() {
        names.add("John");
        names.add("Ethan");
        names.add("Sean");
        names.add("Patty");
        names.add("Java");
        names.add("Duke");
    }
 
    public List<string> getNames() {
        return names;
    }
 
    public void setNames(List<string> names) {
        this.names = names;
    }
 
    public void delete(String name) {
        names.remove(name);
    }
}

ConversationBean.java


1
2
3
4
5
6
7
8
9
10
11
12
13
14
15
16
17
18
19
20
21
22
23
24
25
26
27
28
29
30
31
32
33
34
35
36
37
38
39
40
41
42
43
44
45
46
47
48
49
50
51
52
53
54
55
56
57
58
59
60
61
62
63
64
package com.bluelotussoftware.example.cdi;
 
import java.io.Serializable;
import java.util.ArrayList;
import java.util.List;
import javax.annotation.ManagedBean;
import javax.annotation.PostConstruct;
import javax.enterprise.context.Conversation;
import javax.enterprise.context.ConversationScoped;
import javax.faces.event.ActionEvent;
import javax.inject.Inject;
import javax.inject.Named;
 
/**
 *
 * @author John Yeary
 * @version 1.0
 */
@Named
@ManagedBean
@ConversationScoped
public class ConversationBean implements Serializable {
 
    private static final long serialVersionUID = 5649508572742937677L;
    private List<string> names;
    @Inject
    private Conversation conversation;
 
    public ConversationBean() {
        names = new ArrayList<string>();
    }
 
    @PostConstruct
    private void initialize() {
        conversation.begin();
        names.add("John");
        names.add("Ethan");
        names.add("Sean");
        names.add("Patty");
        names.add("Java");
        names.add("Duke");
    }
 
    public List<string> getNames() {
        return names;
    }
 
    public void setNames(List<string> names) {
        this.names = names;
    }
 
    public void delete(String name) {
        names.remove(name);
    }
 
    public String destroy() {
        conversation.end();
        return "index";
    }
 
    public void destroy(ActionEvent event) {
        conversation.end();
    }
}

Friday, July 06, 2012

JSF 2.1 Custom PrimeFaces 3.3 Tree Example

Custom PrimeFaces Tree
I was looking at the default implementation of PrimeFaces <p:tree /> and <p:treeNode />. The default looks nice, but I wanted a different look with different icons.

The icons I picked look more like "nodes" and "documents. The icons are by Yusuke Kamiyamane in his Fugue Icon set. These icons are released under a Creative Commons 3.0 Attribution License.

I also wanted a more flexible tree model with a custom TreeNode implementation that uses node types (node, leaf), and a data component which is represented by an Object.

The result is a nice looking tree that changes icons subtly on selection, or deselection of a node, and leaf nodes are displayed as document icons.


The Apache Maven project was developed using NetBeans 7, GlassFish 3.1.2, and PrimeFaces 3.3.1


The source code can be downloaded here: primefaces-custom-tree.zip

index.xhtml


1
2
3
4
5
6
7
8
9
10
11
12
13
14
15
16
17
18
19
20
21
22
23
24
25
26
27
28
29
30
31
32
33
34
35
<?xml version='1.0' encoding='UTF-8' ?>
<!DOCTYPE html PUBLIC "-//W3C//DTD XHTML 1.0 Transitional//EN" "http://www.w3.org/TR/xhtml1/DTD/xhtml1-transitional.dtd">
      xmlns:p="http://primefaces.org/ui"
      xmlns:h="http://java.sun.com/jsf/html">
    <h:head>
        <title>Custom PrimeFaces Tree</title>
        <h:outputStylesheet name="custom-tree.css" library="css"/>
    </h:head>
    <h:body>
        <h:form id="form1">
            <p:panel id="panel1" header="Custom PrimeFaces Tree">
                <p:growl id="growl1" showSummary="true" showDetail="true" autoUpdate="true"/>
 
                <p:tree id="tree1" value="#{treeBean.model}"
                        var="node"
                        selectionMode="single"
                        selection="#{treeBean.selectedNode}"
                        >
                    <p:ajax event="select"  listener="#{treeBean.onNodeSelect}" />
                    <p:ajax event="expand" listener="#{treeBean.onNodeExpand}" />
                    <p:ajax event="collapse" listener="#{treeBean.onNodeCollapse}" />
                    <p:treeNode type="node"
                                expandedIcon="folder-open"
                                collapsedIcon="folder-collapsed">
                        <h:outputText value="#{node}"/>
                    </p:treeNode>
                    <p:treeNode type="leaf" icon="document-node">
                        <h:outputText value="#{node}" />
                    </p:treeNode>
                </p:tree>
            </p:panel>
        </h:form>
    </h:body>
</html>

TreeNodeImpl.java


1
2
3
4
5
6
7
8
9
10
11
12
13
14
15
16
17
18
19
20
21
22
23
24
25
26
27
28
29
30
31
32
33
34
35
36
37
38
39
40
41
42
43
44
45
46
47
48
49
50
51
52
53
54
55
56
57
58
59
60
package com.bluelotussoftware.example.jsf;
 
import org.primefaces.model.DefaultTreeNode;
import org.primefaces.model.TreeNode;
 
/**
 * Extension of the {@link org.primefaces.model.DefaultTreeNode} class that
 * overrides the node type, and includes a data component.
 *
 * @see org.primefaces.model.DefaultTreeNode
 * @author John Yeary
 * @version 1.0
 */
public class TreeNodeImpl extends DefaultTreeNode {
 
    private static final long serialVersionUID = 5333810777428638968L;
 
    /**
     * Constructor which sets the {@link com.bluelotussoftware.example.jsf.TreeNodeType}, {@code Object}
     * data, and parent node.
     *
     * @param type The type of node this represents.
     * @param data {@code Object} value stored in the node.
     * @param parent the {@link org.primefaces.model.TreeNode} which is the
     * parent to this object, or {@code null} if this is the "root"
     * node.
     */
    public TreeNodeImpl(TreeNodeType type, Object data, TreeNode parent) {
        super(type.getType(), data, parent);
    }
 
    /**
     * Constructor which sets {@code Object} data, and parent node.
     *
     * @param data {@code Object} value stored in the node.
     * @param parent parent the {@link org.primefaces.model.TreeNode} which is
     * the parent to this object, or {@code null} if this is the
     * "root" node.
     */
    public TreeNodeImpl(Object data, TreeNode parent) {
        super(data, parent);
    }
 
    /**
     * This method returns {@link com.bluelotussoftware.example.jsf.TreeNodeType#getType()}
     * depending on whether the node is a "leaf" node which contains
     * no children, or a "node" if it contains children.
     *
     * @return {@link com.bluelotussoftware.example.jsf.TreeNodeType#getType()}
     * based on whether this node has child objects.
     */
    @Override
    public String getType() {
        if (isLeaf()) {
            return TreeNodeType.LEAF.getType();
        } else {
            return TreeNodeType.NODE.getType();
        }
    }
}

TreeNodeType.java


1
2
3
4
5
6
7
8
9
10
11
12
13
14
15
16
17
18
19
20
21
22
23
24
25
26
27
package com.bluelotussoftware.example.jsf;
 
/**
 * {@code enum} which represents the types of tree objects as either
 * "leaf", or "node".
 *
 * @author John Yeary <jyeary@bluelotussoftware.com>
 * @version 1.0
 */
public enum TreeNodeType {
 
    LEAF("leaf"), NODE("node");
    private String type;
 
    private TreeNodeType(final String type) {
        this.type = type;
    }
 
    @Override
    public String toString() {
        return type;
    }
 
    public String getType() {
        return type;
    }
}

TreeBean.java


1
2
3
4
5
6
7
8
9
10
11
12
13
14
15
16
17
18
19
20
21
22
23
24
25
26
27
28
29
30
31
32
33
34
35
36
37
38
39
40
41
42
43
44
45
46
47
48
49
50
51
52
53
54
55
56
57
58
59
60
61
62
63
64
65
66
67
68
69
70
71
72
73
74
75
76
77
78
79
80
81
82
83
84
85
86
87
88
89
90
91
92
93
94
95
96
97
98
99
100
101
102
103
104
105
106
107
108
109
package com.bluelotussoftware.example.jsf;
 
import java.io.Serializable;
import javax.faces.application.FacesMessage;
import javax.faces.bean.ManagedBean;
import javax.faces.bean.ViewScoped;
import javax.faces.context.FacesContext;
import org.primefaces.event.NodeCollapseEvent;
import org.primefaces.event.NodeExpandEvent;
import org.primefaces.event.NodeSelectEvent;
import org.primefaces.model.TreeNode;
 
/**
 * Page backing bean which manages page data and events.
 *
 * @author John Yeary <jyeary@bluelotussoftware.com>
 * @version 1.0
 */
@ManagedBean
@ViewScoped
public class TreeBean implements Serializable {
 
    private static final long serialVersionUID = 2417620239014385855L;
    private TreeNode root;
    private TreeNode selectedNode;
 
    /**
     * Default constructor
     */
    public TreeBean() {
        root = new TreeNodeImpl("Root", null);
        TreeNode node0 = new TreeNodeImpl("Segment 0", root);
        TreeNode node1 = new TreeNodeImpl("Segment 1", root);
        TreeNode node2 = new TreeNodeImpl("Segment 2", root);
        TreeNode node00 = new TreeNodeImpl("Segment 0.0", node0);
        TreeNode node01 = new TreeNodeImpl("Segment 0.1", node0);
        TreeNode node10 = new TreeNodeImpl("Segment 1.0", node1);
        TreeNode node11 = new TreeNodeImpl("Segment 1.1", node1);
        TreeNode node000 = new TreeNodeImpl("Segment 0.0.0", node00);
        TreeNode node001 = new TreeNodeImpl("Segment 0.0.1", node00);
        TreeNode node010 = new TreeNodeImpl("Segment 0.1.0", node01);
        TreeNode node100 = new TreeNodeImpl("Segment 1.0.0", node10);
 
    }
 
    /**
     * This method returns the tree model based on the root node.
     *
     * @return root node.
     */
    public TreeNode getModel() {
        return root;
    }
 
    /**
     * Gets the selected node in the tree.
     *
     * @return selected node in tree.
     */
    public TreeNode getSelectedNode() {
        return selectedNode;
    }
 
    /**
     * Sets the selected node in the tree.
     *
     * @param selectedNode node to be set as selected.
     */
    public void setSelectedNode(TreeNode selectedNode) {
        this.selectedNode = selectedNode;
    }
 
    /**
     * {@inheritDoc }
     *
     * Adds a {@link javax.faces.application.FacesMessage} with event data to
     * the {@link javax.faces.context.FacesContext}.
     */
    public void onNodeSelect(NodeSelectEvent event) {
        System.out.println("NodeSelectEvent Fired");
        FacesMessage msg = new FacesMessage(FacesMessage.SEVERITY_INFO, "Selected", event.getTreeNode().getData().toString());
        FacesContext.getCurrentInstance().addMessage(event.getComponent().getId(), msg);
    }
 
    /**
     * {@inheritDoc}
     *
     * Adds a {@link javax.faces.application.FacesMessage} with event data to
     * the {@link javax.faces.context.FacesContext}.
     */
    public void onNodeExpand(NodeExpandEvent event) {
 
        System.out.println("NodeExpandEvent Fired");
        FacesMessage msg = new FacesMessage(FacesMessage.SEVERITY_INFO, "Expanded", event.getTreeNode().getData().toString());
        FacesContext.getCurrentInstance().addMessage(event.getComponent().getId(), msg);
    }
 
    /**
     * {@inheritDoc}
     *
     * Adds a {@link javax.faces.application.FacesMessage} with event data to
     * the {@link javax.faces.context.FacesContext}.
     */
    public void onNodeCollapse(NodeCollapseEvent event) {
        System.out.println("NodeCollapseEvent Fired");
        FacesMessage msg = new FacesMessage(FacesMessage.SEVERITY_INFO, "Collapsed", event.getTreeNode().getData().toString());
        FacesContext.getCurrentInstance().addMessage(event.getComponent().getId(), msg);
    }
}

Thursday, July 05, 2012

Exporting Trusted Certificates in Java

I was trying to export some trusted certificates in Java, and I discovered that the default Java keytool will not do it much to my dismay. So I decided to write a little utility class to export the certificates into PEM files from X509 certificates so it would be easier to move them around.

I thought I would clean up my little tool, and share it with the world.

It requires the GlassFish webservices-osgi.jar which is located in the glassfish-3.1.2/glassfish/modules/ directory along with Apache commons-cli-1.2 and commons-io-2.1.

The application takes a couple of command line arguments to work. It has usages, but the project properties also shows all of them in action. You will need to set that up to match your environment in the IDE. Here is an example.

java -jar certificate-manager.jar -f /Applications/NetBeans/jboss-5.0.1.GA/server/default/conf/server.keystore -i "CN=John Yeary, OU=Development, O=Blue Lotus Software, L=Greenville, ST=South Carolina, C=US" -s 4f2ac2cf -p changeit -e

-----BEGIN CERTIFICATE-----
MIICgTCCAeqgAwIBAgIETyrCzzANBgkqhkiG9w0BAQUFADCBhDELMAkGA1UEBhMCVVMxFzAVBgNV
BAgTDlNvdXRoIENhcm9saW5hMRMwEQYDVQQHEwpHcmVlbnZpbGxlMRwwGgYDVQQKExNCbHVlIExv
dHVzIFNvZnR3YXJlMRQwEgYDVQQLEwtEZXZlbG9wbWVudDETMBEGA1UEAxMKSm9obiBZZWFyeTAe
Fw0xMjAyMDIxNzA3MjdaFw0xMjA1MDIxNzA3MjdaMIGEMQswCQYDVQQGEwJVUzEXMBUGA1UECBMO
U291dGggQ2Fyb2xpbmExEzARBgNVBAcTCkdyZWVudmlsbGUxHDAaBgNVBAoTE0JsdWUgTG90dXMg
U29mdHdhcmUxFDASBgNVBAsTC0RldmVsb3BtZW50MRMwEQYDVQQDEwpKb2huIFllYXJ5MIGfMA0G
CSqGSIb3DQEBAQUAA4GNADCBiQKBgQCa564RyVtq+i+L+BsA0YzmpY4WMkfEn++3s10AbUv/IidT
25TixYqc7ghOkA5HI0z893Gy/ozzB6sGJ6gk8W28VjlU0Y4r0NUhUALuDYnkReWeUiUp4ubPoj/G
71WWu8FFQul+DJWAL7c/963rui812HofQuEWnyZjenrXQMvAUwIDAQABMA0GCSqGSIb3DQEBBQUA
A4GBAECXGuLB/ZB33nGauRsW4kqjiPwpkUoc8N7h44JBVATGx210HzNufixYSqq+AQhW86X2DYJ0
yyBGawVQvpUWoBHCVmmNmu6XdYDfSaCUsPeEt0RoFezruTMz6kaedRwK4zP3H3gp6fHYyiq/mD2M
jTna0zCi4o25E3eiOGKvGBd9
-----END CERTIFICATE-----

The project was developed with NetBeans and GlassFish 3.1.2.

The NetBeans project files can be downloaded here: certificate-manager.zip

TrustedCertificatePEMExportUtility.java


1
2
3
4
5
6
7
8
9
10
11
12
13
14
15
16
17
18
19
20
21
22
23
24
25
26
27
28
29
30
31
32
33
34
35
36
37
38
39
40
41
42
43
44
45
46
47
48
49
50
51
52
53
54
55
56
57
58
59
60
61
62
63
64
65
66
67
68
69
70
71
72
73
74
75
76
77
78
79
80
81
82
83
84
85
86
87
88
89
90
91
92
93
94
95
96
97
98
99
100
101
102
103
104
105
106
107
108
109
110
111
112
113
114
115
116
package com.bluelotussoftware.security;
 
import com.sun.xml.wss.util.XWSSUtil;
import java.io.File;
import java.io.FileInputStream;
import java.io.FileOutputStream;
import java.io.IOException;
import java.math.BigInteger;
import java.security.*;
import java.security.cert.CertificateException;
import java.security.cert.X509Certificate;
import org.apache.commons.cli.*;
import org.apache.commons.io.IOUtils;
import sun.misc.BASE64Encoder;
import sun.security.provider.X509Factory;
 
/**
 * <p>
This utility class is for exporting Trusted Certificates from the trusted
 * certificate store. This is usually a file called <strong>cacerts.keystore</strong>, or
 * <strong>cacerts.jks</strong>.</p>
<p>
<strong>Note:</strong> The default implementation of the
 * Java keytool will not export trusted certificates.</p>
*
 * @author John Yeary
 * @version 1.0
 */
public class TrustedCertificatePEMExportUtility extends XWSSUtil {
 
    /**
     * Main application entry point.
     *
     * @param args command line arguments to be processed.
     * @throws KeyStoreException if an exception occurs while processing trusted
     * key store.
     * @throws NoSuchProviderException if an exception occurs while loading
     * certificate store.
     * @throws IOException if an IO exception occurs during reading keystore, or
     * writing certificate.
     * @throws NoSuchAlgorithmException while trying to load the keystore.
     * @throws CertificateException if there is an exception while handling
     * certificate.
     * @throws ParseException if the command line arguments could not be parsed.
     */
    public static void main(String[] args) throws ParseException, KeyStoreException,
            IOException, NoSuchAlgorithmException, CertificateException {
        BASE64Encoder encoder = new BASE64Encoder();
 
        Options options = new Options();
        options.addOption("f", true, "Trusted Keystore File Name");
        options.addOption("i", true, "Certificate Issuer Name");
        options.addOption("s", true, "Certificate Serial Number");
        options.addOption("p", true, "Keystore Password");
        options.addOption("c", false, "Output Certificate Information");
        options.addOption("e", false, "Export X509 PEM certificate");
        options.addOption("h", "help", false, "Help");
 
        CommandLineParser parser = new PosixParser();
        CommandLine cmd = parser.parse(options, args);
 
        if (cmd.hasOption('h')) {
            HelpFormatter formatter = new HelpFormatter();
            formatter.printHelp("com.bluelotussoftware.security.TrustedCertificatePEMExportUtility", options, true);
            System.exit(0);
        }
 
        if (!cmd.hasOption('f')) {
            System.out.println("The trusted keystore must be provided. -h or --help for usage");
            System.exit(-1);
        }
 
        File trustedKeystoreFile = new File(cmd.getOptionValue('f'));
        String issuerName = cmd.getOptionValue('i');
        int i = Integer.parseInt(cmd.getOptionValue('s'), 16);
        BigInteger serialNumber = new BigInteger(Integer.toString(i));
        char[] keystorePassword = cmd.getOptionValue('p').toCharArray();
 
 
        KeyStore trustedKeyStore = KeyStore.getInstance(KeyStore.getDefaultType());
        trustedKeyStore.load(new FileInputStream(trustedKeystoreFile), keystorePassword);
        X509Certificate x509 = getCertificateFromTrustStore(issuerName, serialNumber, trustedKeyStore);
 
        //Print out certificate information to verify certificate output prior to creating PEM
        if (cmd.hasOption("c")) {
            System.out.println("\nX509 Certificate Information. Please verify before using PEM Output!\n");
            System.out.println(x509);
            System.out.println("");
        }
 
        //Output PEM format
        StringBuilder sb = new StringBuilder();
        sb.append(X509Factory.BEGIN_CERT).append("\n");
        sb.append(encoder.encode(x509.getEncoded()));
        sb.append("\n").append(X509Factory.END_CERT).append("\n");
        System.out.println(sb.toString());
 
        if (cmd.hasOption('e')) {
            String fileName = cmd.getOptionValue("e", "x509.pem");
            IOUtils.write(sb.toString(), new FileOutputStream(fileName));
            System.out.println("Certificate Exported to " + fileName);
        }
 
        try {
            PrivateKey privateKey = getPrivateKey(x509, trustedKeyStore, keystorePassword.toString());
            if (privateKey != null) {
                System.out.println("-----BEGIN PRIVATE KEY-----");
                encoder.encodeBuffer(privateKey.getEncoded(), System.out);
                System.out.println("-----END PRIVATE KEY-----");
            }
        } catch (IOException e) {
            System.out.println(e.getMessage());
        }
 
    }
}

PrimeFaces AJAX Enabled <p:selectOneMenu />

I saw a question posed on stackoverflow called Trouble with Primefaces 3.0.M2 SelectOneMenu Ajax behavior and I had just done an example a couple of months ago on a car trip so I decided to post my solution here, and reference it.

Essentially the problem is how to control the list of items in a second <p:selectOneMenu/< from the selection made in the first menu. The question comes up frequently enough that I decided to write up a demo application.

The application was developed using NetBeans 7.1.2 and PrimeFaces 3.2 originally. It has been updated to use PrimeFaces 3.3.1 which is the most current at the time of writing. I validated it on GlassFish 3.1.2.

 The Apache Maven project can be downloaded from here: primefaces-ajax-selectone.zip

This demo wants the user to pick a state, and then a city. A key problem is not just the update, but not displaying city values if a state is not selected. Also erasing the selected city, if the state has changed.

index.xhtml


1
2
3
4
5
6
7
8
9
10
11
12
13
14
15
16
17
18
19
20
21
22
23
24
25
26
27
28
29
30
31
32
33
34
35
36
<?xml version='1.0' encoding='UTF-8' ?>
<!DOCTYPE html PUBLIC "-//W3C//DTD XHTML 1.0 Transitional//EN" "http://www.w3.org/TR/xhtml1/DTD/xhtml1-transitional.dtd">
      xmlns:f="http://java.sun.com/jsf/core"
      xmlns:h="http://java.sun.com/jsf/html"
      xmlns:p="http://primefaces.org/ui"
      >
    <h:head>
        <title>PrimeFaces AJAX Enabled SelectOneMenu</title>
    </h:head>
    <h:body>
        <h:form>
            <p:panel header="Address">
                <h:panelGrid columns="4">
                    <h:outputLabel value="State:" for="states"/>
                    <p:selectOneMenu id="states" value="#{dataBean.selectedState}"
                                     valueChangeListener="#{dataBean.stateChangeListener}" style="width: 150px;">
                        <f:selectItem itemLabel="" itemValue=""/>
                        <f:selectItems value="#{dataBean.states}"/>
                        <p:ajax event="change" update="cities, cs"/>
                    </p:selectOneMenu>
                    <h:outputLabel value="City:" for="cities"/>
                    <p:selectOneMenu id="cities" value="#{dataBean.selectedCity}" style="width: 150px;">
                        <f:selectItem itemLabel="" itemValue=""/>
                        <f:selectItems value="#{dataBean.cities}"/>
                        <p:ajax event="change" update="cs" />
                    </p:selectOneMenu>
                </h:panelGrid>
                <p>
<h:outputText id="cs"
                                  value="#{dataBean.selectedCity} #{dataBean.selectedCity ne null ? ',': '' } #{dataBean.selectedState}"/>
                </p>
</p:panel>
        </h:form>
    </h:body>
</html>

DataBean.java


1
2
3
4
5
6
7
8
9
10
11
12
13
14
15
16
17
18
19
20
21
22
23
24
25
26
27
28
29
30
31
32
33
34
35
36
37
38
39
40
41
42
43
44
45
46
47
48
49
50
51
52
53
54
55
56
57
58
59
60
61
62
63
64
65
66
67
68
69
70
71
72
73
74
75
76
77
78
79
80
81
82
83
84
85
86
87
88
89
90
91
92
93
94
95
96
97
98
99
100
101
102
103
104
105
106
107
108
109
110
111
112
113
114
115
116
117
118
119
120
121
122
123
124
125
126
127
128
129
130
131
132
133
134
135
136
137
138
139
140
141
142
143
package com.bluelotussoftware.example.jsf;
 
import java.io.Serializable;
import java.util.ArrayList;
import java.util.HashMap;
import java.util.List;
import java.util.Map;
import javax.annotation.PostConstruct;
import javax.faces.bean.ManagedBean;
import javax.faces.bean.ViewScoped;
import javax.faces.event.ValueChangeEvent;
import javax.faces.model.SelectItem;
 
/**
 * Page Backing bean for example application.
 *
 * @author John Yeary
 * @version 1.0
 */
@ManagedBean
@ViewScoped
public class DataBean implements Serializable {
 
    private static final long serialVersionUID = -1776353555799643520L;
    private List<selectitem> states;
    private Map<String, List<selectitem>> cities;
    private String selectedState;
    private String selectedCity;
 
    /**
     * Default Constructor.
     */
    public DataBean() {
        states = new ArrayList<selectitem>();
        cities = new HashMap<String, List<selectitem>>();
    }
 
    /**
     * Initializes data.
     */
    @PostConstruct
    private void initialize() {
        states.add(new SelectItem("Maine"));
        states.add(new SelectItem("South Carolina"));
        states.add(new SelectItem("Illinois"));
 
        List<selectitem> mcities = new ArrayList<selectitem>();
        mcities.add(new SelectItem("Augusta"));
        mcities.add(new SelectItem("Bangor"));
        mcities.add(new SelectItem("Bath"));
        mcities.add(new SelectItem("Brunswick"));
        mcities.add(new SelectItem("Castine"));
        mcities.add(new SelectItem("Ellsworth"));
        mcities.add(new SelectItem("Portland"));
        mcities.add(new SelectItem("Woolwich"));
        cities.put("Maine", mcities);
 
        List<selectitem> scities = new ArrayList<selectitem>();
        scities.add(new SelectItem("Charleston"));
        scities.add(new SelectItem("Clemson"));
        scities.add(new SelectItem("Columbia"));
        scities.add(new SelectItem("Greenville"));
        scities.add(new SelectItem("Simpsonville"));
        cities.put("South Carolina", scities);
 
        List<selectitem> icities = new ArrayList<selectitem>();
        icities.add(new SelectItem("Argonne"));
        icities.add(new SelectItem("Batavia"));
        icities.add(new SelectItem("Chicago"));
        icities.add(new SelectItem("Evanston"));
        cities.put("Illinois", icities);
    }
 
    /**
     * Gets the selected city.
     *
     * @return selected city.
     */
    public String getSelectedCity() {
        return selectedCity;
    }
 
    /**
     * Sets the selected city.
     *
     * @param selectedCity city to be set.
     */
    public void setSelectedCity(String selectedCity) {
        this.selectedCity = selectedCity;
    }
 
    /**
     * Gets selected state.
     *
     * @return selected state.
     */
    public String getSelectedState() {
        return selectedState;
    }
 
    /**
     * Sets the selected state.
     *
     * @param selectedState state to be set.
     */
    public void setSelectedState(String selectedState) {
        this.selectedState = selectedState;
    }
 
    /**
     * Gets a {@code List<selectitem>} for populating state names.
     *
     * @return a list of state names.
     */
    public List<selectitem> getStates() {
        return states;
    }
 
    /**
     * Gets a {@code List<selectitem>} of cities based on the selected state.
     *
     * @return a list of cities based on selected state, or an empty list if no
     * state is selected.
     */
    public List<selectitem> getCities() {
        if (selectedState != null) {
            return cities.get(selectedState);
        } else {
            return new ArrayList<selectitem>();
        }
    }
 
    /**
     * This listener cleans up the city value if a new state is selected.
     *
     * @param event a change event when the value of the state changes.
     */
    public void stateChangeListener(ValueChangeEvent event) {
        if (event.getNewValue() != selectedState) {
            selectedCity = null;
        }
    }
}

Wednesday, July 04, 2012

Tip of the Day: Code Review Checklist

Over the last few days,  I have published some code review tips of the day. This post actually contains a link to a Microsoft Word Document with those tips in checklist format.

Code Review Checklist.docx

Tip of the Day: Performance Code Review

Performance

Here are some general best practices to consider around performance code review.

These tips are by no means definitive, but serve as reminders to developers what they should consider in a checklist.

Note: performance code reviews are really not separate processes from a general code review.
  • Objects are duplicated only when necessary. If you must duplicate objects, consider implementing Clone and decide if deep cloning is necessary.
  • No busy-wait loops instead of proper thread synchronization methods. For example, avoid while(true){ ... sleep(10);...}
  • Avoid large objects in memory, or using String to hold large documents which should be handled with better tools. For example, don't read a large XML document into a String, or DOM.
  • Do not leave debugging code in production code.
  • Avoid System.out.println(); statements in code, or wrap them in a boolean condition statement like if(DEBUG) {...}
  • "Optimization that makes code harder to read should only be implemented if a profiler or other tool has indicated that the routine stands to gain from optimization. These kinds of optimizations should be well documented and code that performs the same task should be preserved." - UNKNOWN.

    Note: I found this gem a few years ago, but it is so true. If anyone knows who said this, please comment.

Tuesday, July 03, 2012

Tip of the Day: Error Handling Code Review

Error Handling

Here are some general best practices to consider around error handling code review.

These tips are by no means definitive, but serve as reminders to developers what they should consider in a checklist.

Note: error handling and general code reviews are really not separate processes.
  • Invalid parameter values are handled properly early in methods (Fast Fail).
  • NullPointerException conditions from method invocations are checked.
  • Consider using a general error handler to handle known error conditions.
  • An Error handler must clean up state and resources no matter where an error occurs.
  • Avoid using RuntimeException, or sub-classes to avoid making code changes to implement correct error handling.
  • Define and create custom Exception sub-classes to match your specific exception conditions. Document the exception in detail with example conditions so the developer understands the conditions for the exception.
  • (JDK 7+) Use try-with-resources. (JDK < 7) check to make sure resources are closed.
  • Don't pass the buck! Don't create classes which throw Exception rather than dealing with exception condition.
  • Don't swallow exceptions! For example catch(Exception ignored) {}. It should at least log the exception.

Monday, July 02, 2012

Typed Query RESTful Service Example

This example demonstrates how to use a TypedQuery<T> in a JAX-RS (Jersey) application. The service implementation utilizes a @Stateless session bean to handle the transactions, and scale the application. The application was developed using NetBeans, and GlassFish 3.1.2.

The primary reason for using a TypedQuery<T> is to maintain type safety, and give the compiler a chance to determine if there are any problems with the code. This combined with a CriteriaQuery<T> provide additional safety and functionality that was not available in Java EE5 and JPA 1.0.

There is additional functionality in the application. There is an index page which leads to the examples.

The project can be downloaded here: TypedQueryExample.zip

Interesting Bits...


1
2
3
4
5
6
7
8
9
@GET
@Path("customer/{name}")
@Produces({MediaType.APPLICATION_XML, MediaType.APPLICATION_JSON})
public Customer findByName(@PathParam("name") String name) {
    TypedQuery<Customer> query = em.createNamedQuery("Customer.findByName", Customer.class);
    query.setParameter("name", name);
    Customer result = query.getSingleResult();
    return result;
}

JavaFX 2.2 Pie Chart with JPA 2.0

Shipping Costs By Purchase Order
I saw an example of a Pie Chart using JavaFX. I thought that it looked really nice and I wondered how easy it would be to do using JPA 2.0, an example Apache Derby DB included in NetBeans, and NetBeans 7.2.

Well the first iteration took about 10 minutes, and the tweaking took another 15 minutes. Basically, if you asked me to do it again, I bet I could do it in under 5 minutes. My output looks really cool too.

I saw an old post using JavaFXScript to create a similar output which was used in JSF. I am wondering if I can do the same thing using version 2.2 of JavaFX, or if I should wait until the HTML libraries are complete.

The code for the project can be downloaded here: PieChartExample.zip

PieChartExample.java


1
2
3
4
5
6
7
8
9
10
11
12
13
14
15
16
17
18
19
20
21
22
23
24
25
26
27
28
29
30
31
32
33
34
35
36
37
38
39
40
41
42
43
44
45
46
47
48
49
50
51
52
53
54
55
56
57
58
59
60
61
62
63
64
65
package com.bluelotussoftware.javafx.chart;
 
import com.bluelotussoftware.jpa.PurchaseOrder;
import com.sun.javafx.collections.ObservableListWrapper;
import java.util.ArrayList;
import java.util.List;
import javafx.application.Application;
import javafx.collections.ObservableList;
import javafx.scene.Scene;
import javafx.scene.chart.PieChart;
import javafx.scene.chart.PieChart.Data;
import javafx.scene.layout.StackPane;
import javafx.stage.Stage;
import javax.persistence.EntityManager;
import javax.persistence.EntityManagerFactory;
import javax.persistence.Persistence;
import javax.persistence.TypedQuery;
 
/**
 *
 * @author John Yeary
 * @version 1.0
 */
public class PieChartExample extends Application {
 
    /**
     * @param args the command line arguments
     */
    public static void main(String[] args) {
        launch(args);
    }
 
    @Override
    public void start(Stage primaryStage) {
        List<data> list = new ArrayList<>();
        List<purchaseorder> purchaseOrders = getPurchaseOrders();
 
        for (PurchaseOrder p : purchaseOrders) {
            list.add(new Data(p.getOrderNum().toString(), p.getShippingCost().doubleValue()));
        }
 
        ObservableList<data> data = new ObservableListWrapper<>(list);
 
        PieChart pieChart = new PieChart();
        pieChart.setData(data);
 
        StackPane root = new StackPane();
        root.getChildren().add(pieChart);
 
        primaryStage.setTitle("Shipping Costs By Purchase Order");
        primaryStage.setScene(new Scene(root, 600, 400));
        primaryStage.show();
    }
 
    private List<purchaseorder> getPurchaseOrders() {
        List<purchaseorder> purchaseOrders = new ArrayList<>();
        EntityManagerFactory emf = Persistence.createEntityManagerFactory("PieChartExamplePU");
        EntityManager em = emf.createEntityManager();
        TypedQuery<purchaseorder> tq = em.createNamedQuery("PurchaseOrder.findAll", PurchaseOrder.class);
        purchaseOrders.addAll(tq.getResultList());
        em.close();
        emf.close();
        return purchaseOrders;
    }
}

Tip of the Day: Unit Testing Code Review

Testing

Here are some general best practices to consider around unit test code review.


These tips are by no means definitive, but serve as reminders to developers what they should consider in a checklist.

Note: unit testing and code reviews are really not separate processes.
  • Unit tests are added for each code path, and behavior. This can be facilitated by tools like Sonar, and Cobertura.
  • Unit tests must cover error conditions and invalid parameter cases.
  • Unit tests for standard algorithms should be examined against the standard for expected results.
  • Check for possible null pointers are always checked before use.
  • Array indices are always checked to avoid ArrayIndexOfBounds exceptions.
  • Do not write a new algorithm for code that is already implemented in an existing public framework API, and tested.
  • Ensure that the code fixes the issue, or implements the requirement, and that the unit test confirms it. If the unit test confirms a fix for issue, add the issue number to the documentation.

Sunday, July 01, 2012

JSF Tip of the Day: JSF 2.1 AJAX Examples with PrimeFaces 3.3 and Mojarra 2.1

I have been working with my team at the office to bring them up to speed on using JSF and AJAX. I have been encouraging them to use PrimeFaces to reduce the amount of code required to "AJAXify" JSF components. PrimeFaces has AJAX functionality built in, or uses a simple <p:ajax/> tag to enable it.

However, I think that it is important to be able to use the default Mojarra JSF RI implementation along with its <f:ajax/> functionality both as a tag, and as JavaScript. The code examples below use a combination of PrimeFaces and Mojarra to demonstrate the ease with which you can develop fully functional AJAX applications with JSF.

The examples are done using Apache Maven on NetBeans 7.2 RC 1 and deployed to GlassFish 3.1.2. using JSF 2.1.0 and PrimeFaces 3.3.1.

The code for the project can be downloaded here: ajax-examples.zip

index.xhtml


1
2
3
4
5
6
7
8
9
10
11
12
13
14
15
16
17
18
19
20
21
22
23
24
25
26
27
28
29
30
31
32
33
34
35
36
37
38
39
40
41
42
43
44
45
46
47
48
49
50
51
52
53
54
55
56
57
58
59
60
61
62
63
64
65
66
67
68
69
70
71
72
73
74
75
76
77
78
79
80
81
82
83
<?xml version='1.0' encoding='UTF-8' ?>
<!DOCTYPE html PUBLIC "-//W3C//DTD XHTML 1.0 Transitional//EN" "http://www.w3.org/TR/xhtml1/DTD/xhtml1-transitional.dtd">
      xmlns:h="http://java.sun.com/jsf/html"
      xmlns:p="http://primefaces.org/ui"
      xmlns:f="http://java.sun.com/jsf/core">
    <h:head>
        <title>JSF AJAX Examples</title>
    </h:head>
    <h:body>
        <h:form id="form1">
            <p:panelGrid id="panelGrid1" columns="1">
                <f:facet name="header">
                    <h:outputText value="PrimeFaces AJAX Example"/>
                </f:facet>
                <h:panelGroup>
                    <p:outputLabel for="selectBooleanCheckbox1" value="Enable and Render?"/>
                    <p:selectBooleanCheckbox id="selectBooleanCheckbox1"
                                             value="#{indexBean.selectedBoolean}">
                        <p:ajax event="change" update="panelGroup1 message1"/>
                    </p:selectBooleanCheckbox>
                </h:panelGroup>
 
                <h:panelGroup id="panelGroup1">
                    <p:inputText id="inputText1" disabled="#{!indexBean.selectedBoolean}"
                                 value="Hello World!"/>
                </h:panelGroup>
 
                <h:panelGroup id="message1">
                    <h:outputText id="outputText1"
                                  rendered="#{indexBean.selectedBoolean eq true? true: false}"
                                  value="I am message 1!"/>
                </h:panelGroup>
            </p:panelGrid>
        </h:form>
 
        <h:form id="form2">
            <h:panelGrid id="panelGrid2">
                <f:facet name="header">
                    <h:outputText value="<h:selectOneRadio/> example with <f:ajax/>"/>
                </f:facet>
                <h:panelGroup id="panelGroup2">
                    <h:outputLabel for="selectOneRadio1" value="Display Message?"/>
                    <h:selectOneRadio id="selectOneRadio1" value="#{indexBean.selectedRadioValue1}">
                        <f:selectItem itemLabel="Yes" itemValue="#{true}"/>
                        <f:selectItem itemLabel="No" itemValue="#{false}"/>
                        <f:ajax event="change" render="message2"/>
                    </h:selectOneRadio>
                </h:panelGroup>
 
                <h:panelGroup id="message2">
                    <h:outputText id="outputText2"
                                  rendered="#{indexBean.selectedRadioValue1 eq true ? true : false}"
                                  value="I am message 2!"/>
                </h:panelGroup>
            </h:panelGrid>
        </h:form>
 
        <h:form id="form3">
            <h:outputScript name="jsf.js" library="javax.faces" target="head"/>
            <h:panelGrid id="panelGrid3">
                <f:facet name="header">
                    <h:outputText value="<h:selectOneRadio/> example with onchange event using jsf.ajax.request()"/>
                </f:facet>
                <h:panelGroup id="panelGroup3">
                    <h:outputLabel for="selectOneRadio2" value="Display Message 3?"/>
                    <h:selectOneRadio id="selectOneRadio2" value="#{indexBean.selectedRadioValue2}"
                                      onchange="jsf.ajax.request(this,event,{render:'@form'});return false;">
                        <f:selectItem itemLabel="Yes" itemValue="true"/>
                        <f:selectItem itemLabel="No" itemValue="false"/>
                    </h:selectOneRadio>
                </h:panelGroup>
 
                <h:panelGroup id="message3">
                    <h:outputText id="outputText3"
                                  rendered="#{indexBean.selectedRadioValue2 eq true ? true: false}"
                                  value="Hello John"/>
                </h:panelGroup>
            </h:panelGrid>
        </h:form>
 
    </h:body>
</html>

IndexBean.java


1
2
3
4
5
6
7
8
9
10
11
12
13
14
15
16
17
18
19
20
21
22
23
24
25
26
27
28
29
30
31
32
33
34
35
36
37
38
39
40
41
42
43
44
package com.bluelotussoftware.com.jsf.ajax;
 
import java.io.Serializable;
import javax.faces.bean.ManagedBean;
import javax.faces.bean.ViewScoped;
 
/**
 *
 * @author John Yeary
 * @version 1.0
 */
@ManagedBean
@ViewScoped
public class IndexBean implements Serializable {
 
    private static final long serialVersionUID = 8156962940235133626L;
    private boolean selectedBoolean;
    private boolean selectedRadioValue1;
    private boolean selectedRadioValue2;
 
    public boolean isSelectedBoolean() {
        return selectedBoolean;
    }
 
    public void setSelectedBoolean(boolean selectedBoolean) {
        this.selectedBoolean = selectedBoolean;
    }
 
    public boolean getSelectedRadioValue1() {
        return selectedRadioValue1;
    }
 
    public void setSelectedRadioValue1(boolean selectedRadioValue1) {
        this.selectedRadioValue1 = selectedRadioValue1;
    }
 
    public boolean getSelectedRadioValue2() {
        return selectedRadioValue2;
    }
 
    public void setSelectedRadioValue2(boolean selectedRadioValue2) {
        this.selectedRadioValue2 = selectedRadioValue2;
    }
}
The pictures below demonstrate the before and after of clicking the checkbox, and radio buttons.

Before


After

Do You Remember When?... Closing Windows in Swing

I was just looking at some old Swing code. I mean some really old Swing code, and I found this interesting morsel of code which made me think back to when this was considered the standard mechanism for window management.

Today when we want to control the closing of a JFrame, we would use something like setDefaultCloseOperation(int operation). If we wanted the frame to close when someone clicked the "X", we would set it using setDefaultCloseOperation(JFrame.EXIT_ON_CLOSE). The code I found was the old style of doing it, and it made me think about it. Here is the code snippet I found which would still work today.

1
2
3
4
frame.addWindowListener(new WindowAdapter() {    
public void windowClosing(WindowEvent e) {
System.exit(0);
}});


Here are the rules for the implementation.

There are three elements that the event handling mechanism must employ:
  1. It must implement a listener interface, or extend a class that implements a listener interface.
  2. You must register an event handler class as a listener on one or more components.
  3. The event handler class has code that implements methods in the listener interface.
Does it meet the requirements? It sure does, and the code works today. It is part of my code cleanup for code I have kept since 1995, and I am deciding what is useful.
 
Update: I found this comment in the code too. It is still true and relevant, but I must have thought it important to document since there are so many little event handlers. Since it was not in source control, I have no idea when I wrote this. Perhaps when Swing came on the scene (1997)? Interesting historical note.
The event handler code should be minimized to allow the program to remain responsive to user input. The event handling code is handled on a single thread - event-dispatching thread. This thread also handles the paint and repainting of components. This may also result in "gray screens" while the system is waiting to repaint a component.

Tip of the Day: Documentation Code Review

Documentation

Here are some general best practices to consider around documentation code review.

These tips are by no means definitive, but serve as reminders to developers what they should consider in a checklist.

Note: documentation and code reviews are really not separate processes.
  • All methods are commented in clear language. If it is unclear to the reader, it is unclear to the user.
  • All source code contains @author for all authors.
  • @version should be included as required.
  • All class, variable, and method modifiers should be examined for correctness.
  • Describe behavior for known input corner-cases.
  • Complex algorithms should be explained with references. For example,  document the reference that identifies the equation, formula, or pattern. In all cases, examine the algorithm and determine if it can be simplified.
  • Code that depends on non-obvious behavior in external frameworks is documented with reference to external documentation. 
  • Confirm that the code does not depend on a bug in an external framework which may be fixed later, and result in an error condition. If you find a bug in an external library, open an issue, and document it in the code as necessary.
  • Units of measurement are documented for numeric values.
  • Incomplete code is marked with //TODO or //FIXME markers.
  • All public and private APIs are examined for updates.

ISO-8859-1 Character Encoding

Cuneiform Inscription in Persepolis
This chart is based on my original which I did in 2004 for HTML 4. I decided to update it, and post it since it seems I am always looking for it. This should give a Java, or web developer the Unicode, numeric, and named entity values.

ISO-8859-1 Character Encoding

Unicode Escaped Numeric Entity Named Entity Symbol Description
\u0009 &#009; \t Horizontal tab
\u000A &#010; \n Line feed
\u000D &#013; \r Carriage return
\u0020 &#032; Space
\u0021 &#033; ! Exclamation point
\u0022 &#034; &quot; " Quotation mark
\u0023 &#035; # Hash mark
\u0024 &#036; $ Dollar sign
\u0025 &#037; % Percent sign
\u0026 &#038; &amp; & Ampersand
\u0027 &#039; ' Apostrophe
\u0028 &#040; ( Left parenthesis
\u0029 &#041; ) Right parenthesis
\u002A &#042; * Asterisk
\u002B &#043; + Plus sign
\u002C &#044; , Comma
\u002D &#045; - Hyphen
\u002E &#046; . Period
\u002F &#047; / Slash
\u0030-\u0039 &#048;-&#057; 0-9 Digits 0-9
\u003A &#058; : Colon
\u003B &#059; ; Semicolon
\u003C &#060; &lt; < Less than
\u003D &#061; = Equals sign
\u003E &#062; &gt; > Greater than
\u003F &#063; ? Question mark
\u0040 &#064; @ Commercial at sign
\u0041-\u005A &#065;-&#090; A-Z Letters A-Z
\u005B &#091; [ Left square bracket
\u005C &#092; \ Backslash
\u005D &#093; ] Right square bracket
\u005E &#094; ^ Caret
\u005F &#095; _ Underscore
\u0060 &#096; ` Grave accent
\u0061-\u007A &#097;-&#122; a-z Letters a-z
\u007B &#123; { Left curly brace
\u007C &#124; | Vertical bar
\u007D &#125; } Right curly brace
\u007E &#126; ~ Tilde
\u0082 &#130; , Low left single quote
\u0083 &#131; ƒ Florin
\u0084 &#132; ,, Low left double quote
\u0085 &#133; ... Ellipsis
\u0086 &#134; Dagger
\u0087 &#135; Double dagger
\u0088 &#136; ^ Circumflex
\u0089 &#137; Permil
\u008A &#138; Š Capital S, caron
\u008B &#139; < Less-than sign
\u008C &#140; Œ Capital OE ligature
\u0091 &#145; ` Left single quote
\u0092 &#146; ' Right single quote
\u0093 &#147; " Left double quote
\u0094 &#148; " Right double quote
\u0095 &#149; Bullet
\u0096 &#150; - En dash
\u0097 &#151; Em dash
\u0098 &#152; ~ Tilde
\u0099 &#153; Trademark
\u009A &#154; š Small s, caron
\u009B &#155; > Greater-than sign
\u009C &#156; œ Small oe ligature
\u009F &#159; Ÿ Capital Y, umlaut
\u00A0 &#160; &nbsp; Nonbreaking space
\u00A1 &#161; &iexcl; ¡ Inverted exclamation point
\u00A2 &#162; &cent; ¢ Cent sign
\u00A3 &#163; &pound; £ Pound sign
\u00A4 &#164; &curren; ¤ General currency sign
\u00A5 &#165; &yen; ¥ Yen sign
\u00A6 &#166; &brvbar; | Broken vertical bar
\u00A7 &#167; &sect; § Section sign
\u00A8 &#168; &uml; ¨ Umlaut
\u00A9 &#169; &copy; © Copyright
\u00AA &#170; &ordf; ª Feminine ordinal
\u00AB &#171; &laquo; « Left angle quote
\u00AC &#172; &not; ¬ Not sign
\u00AD &#173; &shy; - Soft hyphen
\u00AE &#174; &reg; ® Registered trademark
\u00AF &#175; &macr; ¯ Macron accent
\u00B0 &#176; &deg; ° Degree sign
\u00B1 &#177; &plusmn; ± Plus or minus
\u00B2 &#178; &sup2; 2 Superscript 2
\u00B3 &#179; &sup3; 3 Superscript 3
\u00B4 &#180; &acute; ´ Acute accent
\u00B5 &#181; &micro; µ Micro sign (Greek mu)
\u00B6 &#182; &para; Paragraph sign
\u00B7 &#183; &middot; · Middle dot
\u00B8 &#184; &cedil; ¸ Cedilla
\u00B9 &#185; &sup1; 1 Superscript 1
\u00BA &#186; &ordm; º Masculine ordinal
\u00BB &#187; &raquo; » Right angle quote
\u00BC &#188; &frac14; 1/4 Fraction one-fourth
\u00BD &#189; &frac12; 1/2 Fraction one-half
\u00BE &#190; &frac34; 3/4 Fraction three-fourths
\u00BF &#191; &iquest; ¿ Inverted question mark
\u00C0 &#192; &Agrave; À Capital A, grave accent
\u00C1 &#193; &Aacute; Á Capital A, acute accent
\u00C2 &#194; &Acirc; ¯ Capital A, circumflex accent
\u00C3 &#195; &Atilde; Ã Capital A, tilde
\u00C4 &#196; &Auml; Ä Capital A, umlaut
\u00C5 &#197; &Aring; Å Capital A, ring
\u00C6 &#198; &AElig; Æ Capital AE ligature
\u00C7 &#199; &Ccedil; Ç Capital C, cedilla
\u00C8 &#200; &Egrave; È Capital E, grave accent
\u00C9 &#201; &Eacute; É Capital E, acute accent
\u00CA &#202; &Ecirc; Ê Capital E, circumflex accent
\u00CB &#203; &Euml; Ë Capital E, umlaut
\u00CC &#204; &Igrave; Ì Capital I, grave accent
\u00CD &#205; &Iacute; Í Capital I, acute accent
\u00CE &#206; &Icirc; Î Capital I, circumflex accent
\u00CF &#207; &Iuml; Ï Capital I, umlaut
\u00D0 &#208; &ETH; Ð Capital eth, Icelandic
\u00D1 &#209; &Ntilde; Ñ Capital N, tilde
\u00D2 &#210; &Ograve; Ò Capital O, grave accent
\u00D3 &#211; &Oacute; Ó Capital O, acute accent
\u00D4 &#212; &Ocirc; Ô Capital O, circumflex accent
\u00D5 &#213; &Otilde; Õ Capital O, tilde
\u00D6 &#214; &Ouml; Ö Capital O, umlaut
\u00D7 &#215; &times; x Multiply sign
\u00D8 &#216; &Oslash; Ø Capital O, slash
\u00D9 &#217; &Ugrave; Ù Capital U, grave accent
\u00DA &#218; &Uacute; Ú Capital U, acute accent
\u00DB &#219; &Ucirc; û Capital U, circumflex accent
\u00DC &#220; &Uuml; Ü Capital U, umlaut
\u00DD &#221; &Yacute; Ý Capital Y, acute accent
\u00DE &#222; &THORN; Þ Capital thorn, Icelandic
\u00DF &#223; &szlig; ß Small sz ligature, German
\u00E0 &#224; &agrave; à Small a, grave accent
\u00E1 &#225; &aacute; á Small a, acute accent
\u00E2 &#226; &acirc; â Small a, circumflex accent
\u00E3 &#227; &atilde; ã Small a, tilde
\u00E4 &#228; &auml; ä Small a, umlaut
\u00E5 &#229; &aring; å Small a, ring
\u00E6 &#230; &aelig; æ Small ae ligature
\u00E7 &#231; &ccedil; ç Small c, cedilla
\u00E8 &#232; &egrave; è Small e, grave accent
\u00E9 &#233; &eacute; é Small e, acute accent
\u00EA &#234; &ecirc; ê Small e, circumflex accent
\u00EB &#235; &euml; ë Small e, umlaut
\u00EC &#236; &igrave; ì Small i, grave accent
\u00ED &#237; &iacute; í Small i, acute accent
\u00EE &#238; &icirc; î Small i, circumflex accent
\u00EF &#239; &iuml; ï Small i, umlaut
\u00F0 &#240; &eth; ð Small eth, Icelandic
\u00F1 &#241; &ntilde; ñ Small n, tilde
\u00F2 &#242; &ograve; ò Small o, grave accent
\u00F3 &#243; &oacute; ó Small o, acute accent
\u00F4 &#244; &ocirc; ô Small o, circumflex accent
\u00F5 &#245; &otilde; õ Small o, tilde
\u00F6 &#246; &ouml; ö Small o, umlaut
\u00F7 &#247; &divide; ÷ Division sign
\u00F8 &#248; &oslash; ø Small o, slash
\u00F9 &#249; &ugrave; ù Small u, grave accent
\u00FA &#250; &uacute; ú Small u, acute accent
\u00FB &#251; &ucirc; Û Small u, circumflex accent
\u00FC &#252; &uuml; ü Small u, umlaut
\u00FD &#253; &yacute; ý Small y, acute accent
\u00FE &#254; &thorn; þ Small thorn, Icelandic
\u00FF &#255; &yuml; ÿ Small y, umlaut

Popular Posts