Showing posts with label JSR-311. Show all posts

Thursday, March 24, 2016

JSF 2.2 Tip of the Day: Using Hibernate Validators with JSF

Introduction

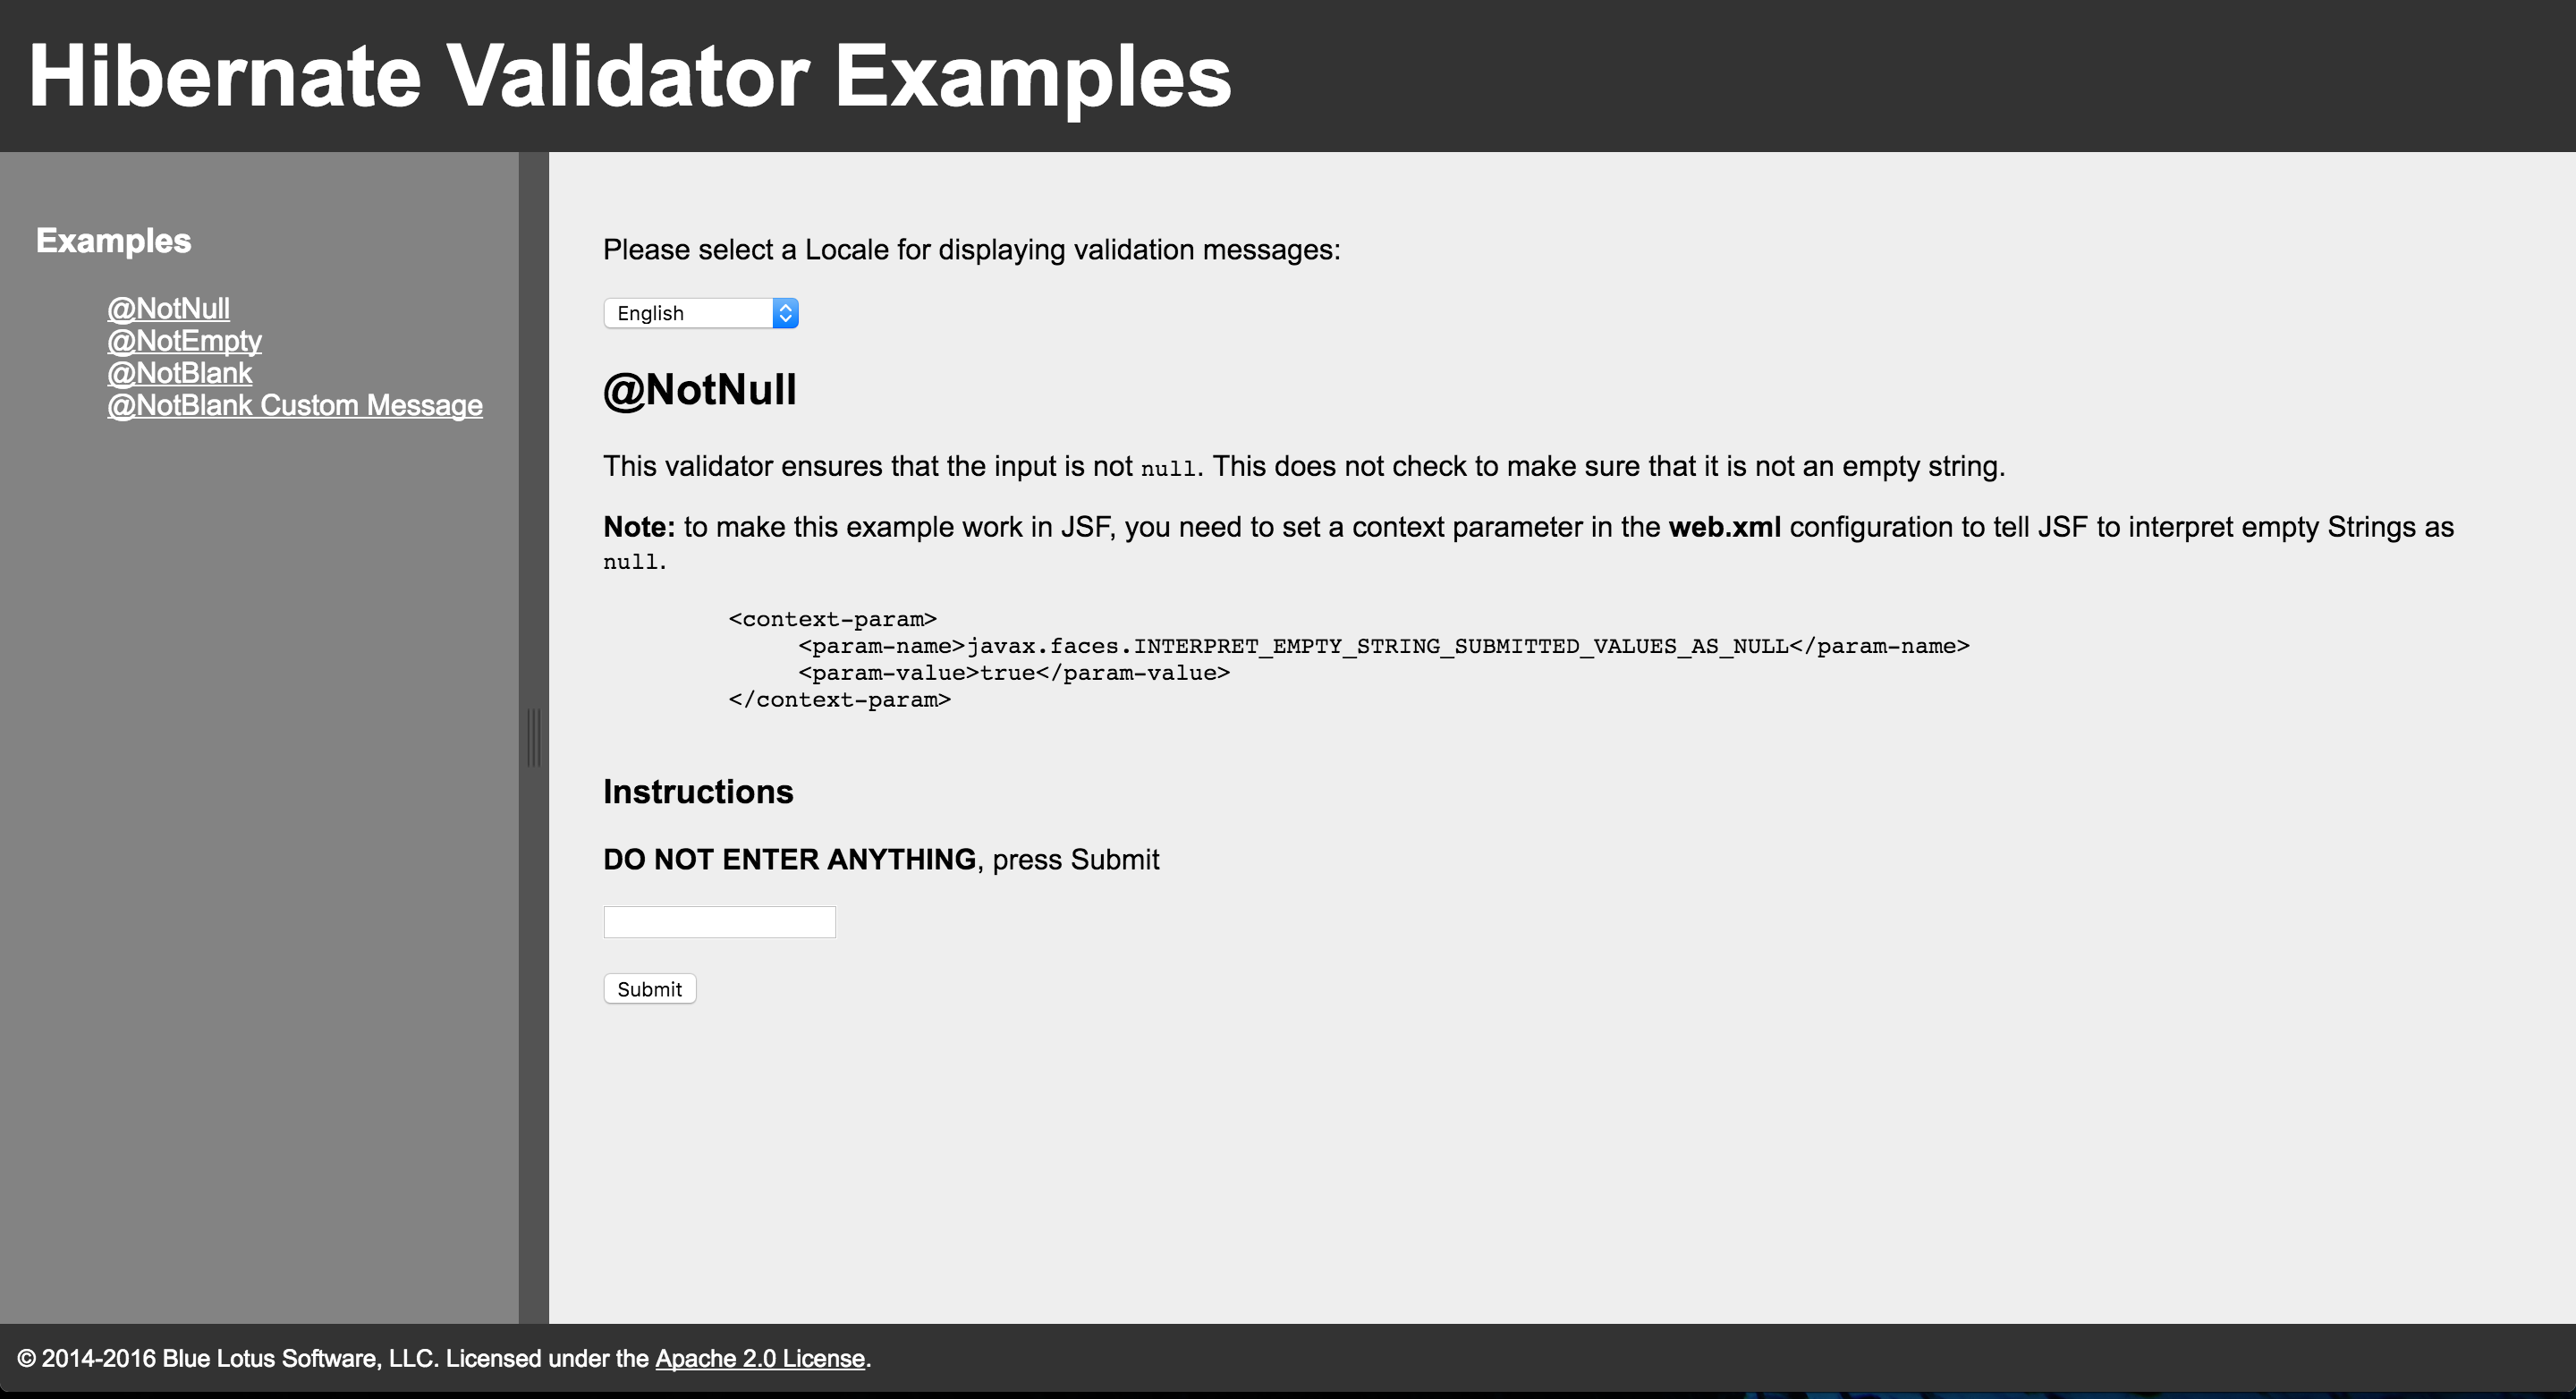
Hibernate validators offer a plethora of validators to make your development work much easier. Some of the common ones that are used are @NotNull, @NotBlank, and @NotEmpty. To take advantage of these validators, and avoid some misconceptions, a little information needs to be provided.

@NotNull

Everyone likes this particular annotation, and it can be a real life saver. However something that often catches developers using it on JSF is that JSF treats empty form fields as empty strings. This is not the same as null. So if you want JSF to capture these values and treat them as null values, you need to tell JSF to do so. This is accomplished by adding the following context parameter to the web.xml file.
    <context-param>
         <param-name>javax.faces.INTERPRET_EMPTY_STRING_SUBMITTED_VALUES_AS_NULL</param-name>
         <param-value>true</param-value>
    </context-param>
Once this is added to the context, all blanks will be treated as null values. Be mindful of any side effects created from this change.

@NotEmpty

This validator causes a lot of confusion. The value can not be null, but can be any character including whitespace, e.g. You can enter a space, and it will accept it.

@NotEmpty

This is the most useful annotation from my standpoint. This makes sure that the input is not null, and is not an empty string like white spaces. This is really what I think most developers are really after anyway. They want to make sure that users fill in form fields.

Code

The code for this project can be found on Github, and includes some additional bonus code such as using locales, and custom messages. The code can be found here: jsf-hibernate-validator.


Tuesday, March 22, 2016

JSF 2.2 Tip of the Day: Using ValueExpressions and VariableMapper to set EL using a PhaseListener

The title seems like a mouthful, and it is. I had some code which I used to demonstrate how to set EL values using a PhaseListener. I was going to delete the code when I decided that it was the second time someone in a short span of time asked me the same question, and I should post how to do it.

The use of a PhaseListener to set EL values seems to the casual observer like Voodoo magic. You will see the EL expressions on the page, and they magically seem to populate. In some ways it is like a classical interceptor which can make your code really seem magical, and lead to confusion. This approach though has its place, and if used correctly can solve a lot of issues. One example is determining if a <ui:include src="XXX" rendered="#{EL_VARIABLE_HERE}" /> should render.

It can also be used to set the src value on the fly. An always popular question on how to resolve.

The project can be found on GitHub here: jsf-ve-phaselistener

So the output looks like a nice set of name value pairs using the Greek alphabet as variable names.


Wednesday, April 01, 2015

JSF 2.2 Tip of the Day: p:passthrough and How to use it

I was asking my team to go through their JSF pages, and to update the XML namespaces to use the latest namespace from the JSF 2.2 specification. While I was looking at the code, I found a number of instances where developers were adding attributes like name to <h:commandButton /> and NetBeans correctly was identifying that there is an issue with that.

Fortunately, some of these attributes were passing through to the underlying page without needing p:passthrough. However, you should not rely on such functionality to work. If the VDL Document does not show it as an attribute, you shouldn't expect it to work.

Alright, so how do we do it correctly?

There is no magic here. It is simply a matter of adding the attribute with a prefix of p:, for example p:name="someName" for the name attribute. This will result in the attribute being passed through the rendered and added to the resulting output.

So I have an example, and the resulting output.

The resulting output will run the JavaScript associated with the passed through attributes, or set the CSS styling. Very simple and easy to implement.

Tuesday, February 17, 2015

JSF 2.x Tip of the Day: Implementing a ViewMapListener

A map of the lands where the Trobadors flourished. 
"France 1154-en" by Reigen - Own work
Licensed under CC BY-SA 4.0 via Wikimedia Commons.

Introduction

There are a number of SystemEvents supported by JSF 2.x. A question that comes up frequently is how to implement them. In a number of cases on stackoverflow, it is implemented using a PhaseListener. I was looking for a way to cleanup the view map, or just get values from it before it was destroyed. I decided that the simplest way to do so was to implement a ViewMapListener. I also noticed that there were very few posts on how to implement it using the faces-config.xml so I decided to use that approach since it was instructive and more clear to me.

Implementation

The basic implementation requires that you add our listener implementation to the faces-config.xml. The example I have here is designed to get called on a PreDestroyViewMapEvent which is called on a normal navigation. We can force it though by adding a @PreDestroy annotation to a method to invoke before being destroyed. Inside the method we would need to get the UIViewroot view map, and call clear(). This would cause our listener to be invoked too. It would be a good cleanup mechanism for cleaning up resources on session expiration too, but at the moment this does not work on JSF 2.1. The @PreDestroy is not called on session timeout on JSF 2.1. This is expected to be an enhancement in JSF 2.2+.

The code for the project can be downloaded from Bitbuket here: viewmaplistener-example

Conclusion

The example above is just one mechanism of using a SystemEvent listener. You may decide to read values from the map, and add them to the session, or manipulate it in some other way before the data is destroyed.

Sunday, December 21, 2014

JSF 2.x Dynamic Encoding

Encoding Examples
In an Internationalized world, we need to be able to change the encoding of a JSF page dynamically. In this case, we have some characters encoded in UTF-8, but we want to be able to change the encoding on the page, and have the framework handle the character conversions for our web page.

So how do we do it?

One of the simplest ways is to wrap our page in a <f:view /> tag. The tag wraps the <head/> and <body/> elements in our HTML page. In the example above this is accomplished as shown below: The code for the backing bean is shown below:

EncodingBean.java


The Netbeans Maven project can be found here: JSF Dynamic Encoding

Tuesday, October 15, 2013

JAX-RS Tip of the Day: JIRA and REST Client

Introduction

We are finishing up a release cycle at work. We have switched from Clearcase to Mercurial, and from a home grown bug tracking system to JIRA. We just released our latest software release on Monday, and its time to clean up the repo and JIRA.

Here is the situation. We chose for this release iteration to use a JIRA issue per branch approach. This worked for our situation where we had a number of new users to Mercurial, and JIRA. We could easily manage any issues with the build, or user mistakes. We will re-think the approach now that our team are up to speed on Mercurial.

We also implemented a server side Mercurial trigger that checked if the JIRA issue was assigned to the committer (person pushing to "master" repo). If not, they would not be able to push to the server. That way we could make sure that there were issues associated with check-ins.

So far, I think we did a good job since we yanked the rug from under the staff. QA finished their process and marked all of the JIRA issues closed. However, they don't have permissions to modify Mercurial to close the branches. That makes sense because they should be testing and not writing code. Now it is time to pay the piper.

We needed a mechanism to read the JIRA issues, look for the closed issues, assign them to a primary committer on JIRA with permissions on Mercurial, close the branch, and push to update the issue with a JIRA comment from the Mercurial check-in trigger. Got that?

Lets try that again...
  1. Read the JIRA issues and find all CLOSED issues.
  2. Read all of the Mercurial branches that are not closed. Remember the branches have the same name as the JIRA issue.
  3. Assign the JIRA issue to a primary committer.
  4. Switch to the branch and update
  5. Close branch and commit
  6. Push to "Master" server. This will not work unless the issue is assigned to primary committer since it has a commit trigger.
  7. The commit will update JIRA with the closed branch commit comments.

Are you still with me?

The code we wrote to do most of the work is proprietary. However, one aspect of it is worth sharing with the community. How do you assign a JIRA ticket to another user using the JIRA REST interface. The code below demonstrates how to do that.

Code

IssueAssignmentClient.java


App.java


Wednesday, September 11, 2013

JAX-RS 1.x Tip of the Day: Using POST with JAX-RS

http://commons.wikimedia.org
I was looking over some more unpublished code, and found a simple gem that demonstrates how to use a HTTP POST with JAX-RS and a @Singleton.

The code was originally developed with JAX-RS 1.0, but I went back and retrofitted it to work on JAX-RS 1.1. The code has a @Singleton that manages the "Widgets" that are created using the HTTP POST. It is a simple and fun example of what you can do with JAX-RS.

It is a simple application that creates "Widget" objects and returns JSON with the widget data.

The code for the project can be found here: jersey-post-example

Note: This example application needs to be run on GlassFish 3.1.2+ because of an issue with Guava GlassFish 4.

JSON Response


WidgetSingleton.java


ExampleResource.java


Widget.java


Thursday, April 25, 2013

JAX-RS Tip of the Day: How Do I Read the Authorization Header?

I was looking for a simple method to read the HttpHeaders to determine the username and password for a request. I didn't find a quick answer so I wrote a simple utility method that will return the Base 64 decoded values from the authorization header.

Friday, July 27, 2012

JAX-RS Tip of the Day: Basic Client Authentication

This is the second part of the JAX-RS Tip of the Day: Basic Authentication with JDBC. If you have not already done the pre-requisites, please examine the other article first.

Abstract

Unless you are developing a public service where authentication is not required like weather, or time services. This means that you will require authentication, and authorization. This application demonstrates how to perform basic authentication. This may be all that is required for your application, as long as, it is operating in a secure environment, or using secure transport (HTTPS).

Technical Details

If you have already completed creating a secure service, then you will really like how easy it is to create a basic authentication client for that service.

Requirements

As you can see from the code below. The most important item is to add a HTTPBasicAuthFilter to allow you to authenticate. Its that simple... really.

ExampleResourceClient.java


package com.bluelotussoftware.jersey;

import com.sun.jersey.api.client.WebResource;
import com.sun.jersey.api.client.filter.LoggingFilter;

/**
 * REST Basic Authentication Client Application
 *
 * @author John Yeary
 * @version 1.0
 */
public class BasicAuthenticationClient {

    public static void main(String[] args) {
        ExampleResourceClient erc = new ExampleResourceClient();
        erc.setUsernamePassword("jyeary", "test");
        System.out.println(erc.getMessage());
        erc.close();
    }

    static class ExampleResourceClient {

        private com.sun.jersey.api.client.WebResource webResource;
        private com.sun.jersey.api.client.Client client;
        private static final String BASE_URI = "http://localhost:8080/secure-jdbc-rest-service/resources";

        public ExampleResourceClient() {
            com.sun.jersey.api.client.config.ClientConfig config = new com.sun.jersey.api.client.config.DefaultClientConfig();
            client = com.sun.jersey.api.client.Client.create(config);
            client.addFilter(new LoggingFilter());
            webResource = client.resource(BASE_URI).path("example");
        }

        public String getMessage() throws com.sun.jersey.api.client.UniformInterfaceException {
            WebResource resource = webResource;
            return resource.accept(javax.ws.rs.core.MediaType.TEXT_PLAIN).get(String.class);
        }

        public void putMessage(Object requestEntity) throws com.sun.jersey.api.client.UniformInterfaceException {
            webResource.type(javax.ws.rs.core.MediaType.TEXT_PLAIN).put(requestEntity);
        }

        public void close() {
            client.destroy();
        }

        public void setUsernamePassword(String username, String password) {
            client.addFilter(new com.sun.jersey.api.client.filter.HTTPBasicAuthFilter(username, password));
        }
    }
}

Thursday, July 26, 2012

JAX-RS JUG Demo CDI and @Singleton Usage

This is the last demonstration I gave at the Greenville Java Users Group (GreenJUG) on CDI and JAX-RS. I cleaned up the code, but not as much as you would think. I managed to code this in about 15 minutes during the meeting live while everyone watched. It was a fun experience, but the best part is that it worked during a live un-rehearsed demo.

It goes to show you that CDI and JAX-RS are simple enough in combination to use in a live high stress demo environment. Imagine what it could do for you in your code. This code was written using NetBeans 7 IDE which may be responsible for the simplicity as much as the other technologies.

Here is the source code: cdi-example.zip

The code below demonstrates some interesting bits. The source code above contains the less interesting POJOs.

PersonResource.java


PersonDB.java


JAX-RS JUG Demo Examples (@QueryParam and @PathParam)

I gave a demo of JAX-RS using @QueryParam and @PathParam annotations, and created a client to connect with the resources and display the results. I promised to post the code. So here it is along with some cleanup.

Here are the Apache Maven projects and code:
simple-queryparam-example.zip
simple-queryparam-client-example.zip

Example.java


SimpleExampleClientApplication.java


Wednesday, July 25, 2012

JAX-RS Tip of the Day: Basic Authentication with JDBC

Abstract

Unless you have a public API like a weather service, or perhaps barometric pressure measurements. You will likely need some form of authentication, and authorization for your service. A tried and tested mechanism is to use JDBC Realm based authentication. In this example I will create  a set of database tables on Apache Derby, set up the security realm on GlassFish 3.1.2.2, and configure basic authentication on a RESTful web service. The majority of the work will be done using the NetBeans IDE 7.2.

Requirements

Database

The first thing we need to do is to set up our database tables which we will use for authentication. These tables can contain more information, but in my example I will keep them simple.

Creating Tables

First we will need to create a Users table which will contain our username and password. Using the sample database in NetBeans do the following:
  1. Select the Services Window, and open the Databases selection
  2. Right click on the Java DB icon, and start the server if it is not already started
  3. Right click on the sample database connection: jdbc:derby://localhost:1527/sample [app on APP] and connect.
  4. Right click on the sample connection and select Execute Command.
  5. Execute the create table commands and create index commands below.
CREATE TABLE users ( username varchar(255) NOT NULL, password varchar(255) DEFAULT NULL, PRIMARY KEY (username) );
CREATE TABLE groups ( username varchar(255) DEFAULT NULL, groupname varchar(255) DEFAULT NULL);
CREATE INDEX groups_users_idx ON groups(username ASC);
Create Tables

Add Users and Groups

We need to add at least one user and group to our table. Since I am using GlassFish as the container, I will use SHA-256 to hash my password. That way it is not visible in plain text.
  1. Right click on our new USERS table, and select View Data
  2. Click on the Insert Records Icon
  3. Add a user, and add a SHA-256 hash of the password.
    Note:An online generator can be found at SHA-256 hash calculator
  4. Repeat the same process as above to open the GROUPS table
  5. Add the username and a group called users
That completes all we need for our JDBC authentication.

GlassFish JDBC Realm

Using the NetBeans IDE perform the following:
  1. Go to the Services window and expand the Servers selection.
  2. Right click on GlassFish 3.1.2 server and select Start.
  3. Right click and select View Domain Admin Console.
  4. On the Admin console web page on the tree on the left select Configurations » server-config » Security » Realms.
  5. Add a new realm called jdbc with the following properties:
    • Name: jdbc
    • Class Name: com.sun.enterprise.security.auth.realm.jdbc.JDBCRealm
    • JAASContext: jdbcRealm
    • JNDI: jdbc/sample
    • User Table: users
    • User Name Column: username
    • Password Column: password
    • Group Table: groups
    • Group Table User Name Column: username
    • Group Name Column: groupname
    • Database User: app
    • Database Password: app
    • Digest Algorithm: SHA-256
    • Encoding: Hex
    • Charset: UTF-8

    Note: the parameters are case sensitive.
  6. Navigate to Configurations » server-config » Security
  7. Change the Default Realm to jdbc
  8. Check the Default Principal To Role Mapping checkbox to enabled
  9. Click Save and Restart server.
The security mapping configuration for automatic mapping makes it so that our application will not require a glassfish-web.xml file as part of our deployment.

JAX-RS Application

Finally we have completed all of the requirements on the server side for securing our applications. This security mechanism can be used by more than the application we will are preparing to deploy. We need to set up the security constraints in our web.xml file as shown below. If you have downloaded the code you can simply open it in NetBeans and examine it.

web.xml


Using NetBeans, you can simply run the application and it will prompt you for an application server. Select the current GlassFish server we have set-up, and it will deploy in a few seconds. You will come to a index.jsp page.
Click on the link for the application.wadl, or navigate to http://localhost:8080/secure-jdbc-rest-service/resources/example and you will be prompted to login. Once you login, you should get this message from the REST service.
This is an example message

Sunday, July 08, 2012

JAX-RS Simple XML Service and Client Example

I thought that I would publish the information and code from a recent JUG meeting where I coded some simple JAX-RS examples on the fly to show how easy it can be to create RESTful web services.

This particular code for the service and client are nothing fancy, but I told the JUG members that I would publish it when I got a chance.

Code

The Apache Maven based projects were developed using the NetBeans 7 IDE and GlassFish 3.1.2. You will need to run the simple-xml-example project first before you can run the client application.

The code for the projects can be downloaded here: simple-xml-example.zip and simple-xml-example-client.zip

ExampleResource.java


SimpleXMLExampleClient.java


Monday, July 02, 2012

Typed Query RESTful Service Example

This example demonstrates how to use a TypedQuery<T> in a JAX-RS (Jersey) application. The service implementation utilizes a @Stateless session bean to handle the transactions, and scale the application. The application was developed using NetBeans, and GlassFish 3.1.2.

The primary reason for using a TypedQuery<T> is to maintain type safety, and give the compiler a chance to determine if there are any problems with the code. This combined with a CriteriaQuery<T> provide additional safety and functionality that was not available in Java EE5 and JPA 1.0.

There is additional functionality in the application. There is an index page which leads to the examples.

The project can be downloaded here: TypedQueryExample.zip

Interesting Bits...


Friday, January 20, 2012

JAX-RS Tip of the Day: Use GZIP compression

JAX-RS (Jersey) offers a GZIP filter to compress data for responses, and to handle GZIP compressed requests. This functionality is very easy to enable, and is configurable for both requests, and responses. That does not get much easier.


 You can prove that this works by querying your resource with Firebug, or Developer Tools (depending on browser). You can also confirm that it is working by performing a query like:
curl -HAccept-Encoding:gzip -HAccept:application/json http://localhost:8080/content-coding-gzip/webresources/widget > json.gz
gzip -v -l json.gz
method  crc     date  time           compressed        uncompressed  ratio uncompressed_name
defla 3a79ae18 Jan 20 15:25                1370                3389  60.3% json

The only issue that I have with the currently implemented version is that it does not use configurable compression level.

Tuesday, January 17, 2012

JAX-RS Tip of the Day: Use OPTIONS Method to Determine Resource Capabilities

Did you know that you can make an OPTIONS method call to a JAX-RS resource to determine its capabilites? JAX-RS supports a complete set of HTTP methods including OPTIONS.

If you make a specific URI request to a resource, it will return the supported methods like GET, PUT, HEAD, and OPTIONS. In addition, Jersey supports returning the WADL file by default. This allows tools like NetBeans to take advantage of the resource.

So I guess some examples are in order. The first example is a request to the server URI which in this case is GlassFish 3.1.1. This is followed by a request to a specific resource on the server instance.
curl -X OPTIONS -v http://localhost:8080
* About to connect() to localhost port 8080 (#0)
*   Trying ::1... Operation not permitted
*   Trying 127.0.0.1... connected
> OPTIONS / HTTP/1.1
> User-Agent: curl/7.22.0 (i686-pc-cygwin) libcurl/7.22.0 OpenSSL/0.9.8r zlib/1.2.5 libidn/1.22 libssh2/1.2.7
> Host: localhost:8080
> Accept: */*
>
< HTTP/1.1 200 OK
< X-Powered-By: Servlet/3.0 JSP/2.2 (GlassFish Server Open Source Edition 3.1.1 Java/Sun Microsystems Inc./1.6)
< Server: GlassFish Server Open Source Edition 3.1.1
< Allow: GET, HEAD, POST, PUT, DELETE, TRACE, OPTIONS
< Content-Length: 0
< Date: Tue, 17 Jan 2012 14:31:17 GMT
<
* Connection #0 to host localhost left intact
* Closing connection #0
As you can see the command reports that GlassFish supports all standard HTTP 1.1 methods as denoted by the Allow: header. This example calls a specific resource on the server which only supports a subset of the HTTP methods based on the annotations in the resource. The methods always supported by a resource are HEAD and OPTIONS, but this has two methods annotated as @GET and @POST. Additionally, not that the Content-Type: application/vnd.sun.wadl+xml is returned which includes the WADL for this particular resource.
curl -X OPTIONS -v http://localhost:8080/RESTApproachFormParameter/resources/example
* About to connect() to localhost port 8080 (#0)
*   Trying ::1... Operation not permitted
*   Trying 127.0.0.1... connected
> OPTIONS /RESTApproachFormParameter/resources/example HTTP/1.1
> User-Agent: curl/7.22.0 (i686-pc-cygwin) libcurl/7.22.0 OpenSSL/0.9.8r zlib/1.2.5 libidn/1.22 libssh2/1.2.7
> Host: localhost:8080
> Accept: */*
>
< HTTP/1.1 200 OK
< X-Powered-By: Servlet/3.0 JSP/2.2 (GlassFish Server Open Source Edition 3.1.1 Java/Sun Microsystems Inc./1.6)
< Server: GlassFish Server Open Source Edition 3.1.1
< Allow: OPTIONS,POST,GET,HEAD
< Content-Type: application/vnd.sun.wadl+xml
< Content-Length: 1085
< Date: Tue, 17 Jan 2012 15:01:49 GMT
<
* Connection #0 to host localhost left intact
* Closing connection #0
In summary, you can take advantage of the OPTIONS method to determine what a particular resource will provide for you without any knowledge of the subject domain.
Thursday, January 12, 2012

JAX-RS Tip of the Day: Client Content Negotiation

One of the less discussed aspects of JAX-RS based on the HTTP 1.1 specification is client negotiation. We often write our applications from the server side and expect the client to send us an Accept: */* header which details which media types the client can accept. The server simply returns whatever we have coded for example @Produces({MediaType.APPLICATION_JSON, MediaType.APPLICATION_XML}). However I bet a number of you have seen something like this before:
http://www.example.com/documents/mydoc?format=doc
http://www.example.com/documents/mydoc.xml
The first example is not very subtle. It tells you the client wants a mydoc.doc by requesting a specific format. The second example is more subtle, and the end user (client) may not notice. I made it a "little" more obvious by changing it to .xml. However, most folks would have missed it if I used mydoc.doc. You would have assumed it was a MS Word document to start with. In actuality, the media type returned here is controlled by the file extension.

Note: Updated the source code to include header based negotiation, but this is just mimicking server content negotiation.

In the attached Apache Maven project developed on NetBeans 7.1: jersey-content-negotiation.zip. I demonstrate how to do it.

The first example returns JSON by default, and other media formats as requested. If it does not understand the media type requested, it simply returns plain text.

On the second example which uses the media type extension, I return a 400 - Bad Request instead of plain text like the first example. This subtlety is based on the fact that the client is requesting a specific type based on extension. If you ask for .pdf and get .txt, the result may cause an unanticipated consequence so it is better to throw an exception.

The mixed media type returns are possible because of the Response being wrapped as demonstrated in a previous post: JAX-RS Tip of the Day: Use Response to wrap... Responses.

ContentNegotiationResource.java


Client Negotiation Examples

Wednesday, January 11, 2012

JAX-RS Tip of the Day: Use Response to wrap... Responses

One of the really nice features of JAX-RS is the ability to implement fine grained control over the response returned from the server based on the client request. The Response.ResponseBuilder gives us incredible flexibility to generate the response. Since it uses the builder pattern, it is easy to daisy-chain the information we want into a custom response.

I would highly recommend that you consider returning a custom response for all requests. I would like to explain with an example. I would like to perform a @POST request where I am creating a new object on the server. Since it is a HTTP 1.1 request, I look at Hypertext Transfer Protocol -- HTTP/1.1 (RFC-2616) to see what I must, should, and may return. The difference in the word choices has specific meaning in the specification. In my case, I would like to be completely compliant.

10.2.2 201 Created
The request has been fulfilled and resulted in a new resource being created. The newly created resource can be referenced by the URI(s) returned in the entity of the response, with the most specific URI for the resource given by a Location header field. The response SHOULD include an entity containing a list of resource characteristics and location(s) from which the user or user agent can choose the one most appropriate. The entity format is specified by the media type given in the Content-Type header field. The origin server MUST create the resource before returning the 201 status code. If the action cannot be carried out immediately, the server SHOULD respond with 202 (Accepted) response instead.
A 201 response MAY contain an ETag response header field indicating the current value of the entity tag for the requested variant just created, see section 14.19.

OK, the basic response must return 201 - Created status, and a Location header. It should contain an entity (which may only be entity-headers) and may contain an ETag. This is all very easy to do with Jersey. As you can see from the code snippet, we read the @FormParam information from a form, and create an object which we add to a List<Widget%gt; objects signified by the ws.add(widget) we get the index value for use in our URI. Next we create a URI from our request, and add a path to it for our index.

Finally we use Apache Commons Codec Hex to generate a hex string for our ETag. Finally this is all combined in a Response sent back to the client. This can be seen below.

Tuesday, January 10, 2012

Interesting Articles on JAX-RS

What do I Read?

I was asked what articles I really like on Jersey, and how to learn more about it. Here is an incomplete list.

If you find more really good ones, please post comments, and I will add them to the list if I like them.

Thursday, January 05, 2012

JAX-RS Tip of the Day: Using @CookieParam

I am not a fan of using cookies in REST based services. I think that it makes the service less usable since the client must be able to store and retrieve cookies. This limits usage of the service, and introduces state outside of the service. Even the RFC for cookies is called HTTP State Management Mechanismcurl can be used to send cookies to test so not all is lost.

Alright, if I have not talked you out of using them yet, you must have a need for them.  (Please rethink the idea though).

Use of cookies is accomplished by using the @CookieParam annotation. Also you can return responses as shown in the code below which include cookies.

Cookies have a limitations on the use of some characters, and names so please look at the RFC noted above for additional limitations. I demonstrate a couple of limitations which include the use of semi-colons (;), and commas(,). The nice thing about this example is you can see the output in a real browser (Internet Explorer not included) since most can handle application/json objects which are returned.

Here is the example code developed using NetBeans 7.1 RC2 and GlassFish 3.1.1cookie-parameters.zip

CookieParameterResource.java


Popular Posts